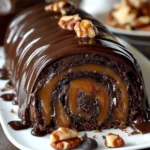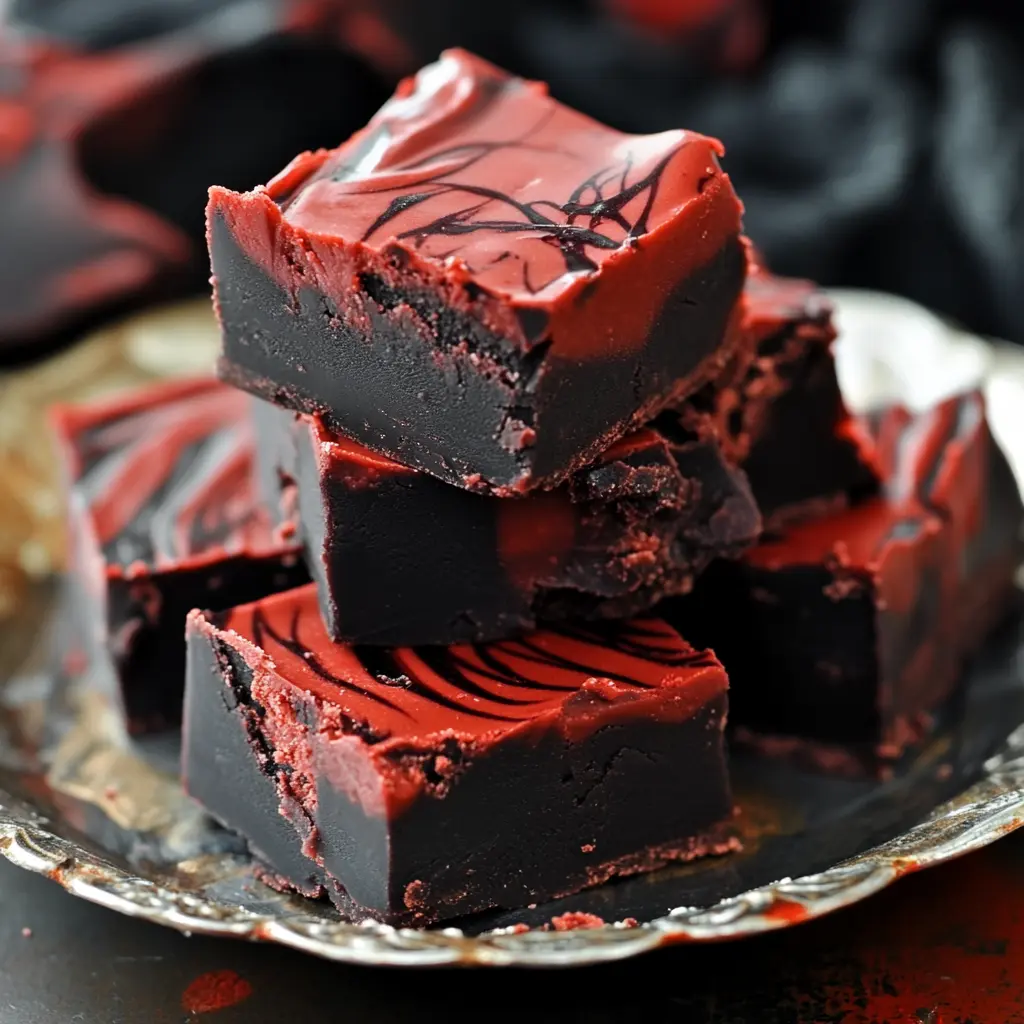
Description of this recipe: Vampire Fudge is a show-stopping dessert that perfectly blends rich chocolate flavor with a captivatingly blood-red swirl. This easy-to-make fudge features a dark chocolate base topped with a sweet, intensely colored red layer, creating a striking visual contrast that’s perfect for Halloween, themed parties, or any occasion where you want to add a touch of drama to your dessert table. The combination of white chocolate, cocoa, and a touch of vanilla delivers a delightful sweetness balanced by a subtle cocoa bitterness, resulting in a truly irresistible treat.
Why you will love this recipe:
- Visually Stunning: The dramatic contrast between the dark chocolate base and the vibrant red swirl creates a beautiful and eye-catching dessert. It’s perfect for themed parties, especially around Halloween.
- Easy to Make: This recipe requires minimal effort and few ingredients, making it ideal for both novice and experienced bakers. There’s no need for candy thermometers or complicated techniques.
- Rich and Delicious: The combination of white chocolate, cocoa, and sweetened condensed milk results in a creamy, decadent fudge that satisfies even the most intense sweet cravings.
- Customizable: You can easily adapt the color intensity and swirl patterns to match your specific preferences or party theme. Get creative and experiment with different variations!
- Perfect for Gifting: Vampire Fudge is a delightful homemade gift for friends and family. Package it in decorative boxes or tins to create a memorable and personalized present.
Introduction
Vampire Fudge is more than just a dessert; it’s a conversation starter. The striking visual appeal, reminiscent of dark, mysterious forces, makes it a memorable treat that will impress your guests. This recipe is incredibly simple, requiring minimal baking skills and readily available ingredients. The magic lies in the contrasting colors and the ease of assembly, making it a perfect project for any occasion.
The fudge’s deep, dark chocolate base provides a subtle bitterness that beautifully complements the sweetness of the bright red layer. The swirl effect adds an element of artistry, turning each piece into a unique, handcrafted masterpiece. Whether you’re hosting a Halloween party, a vampire-themed event, or simply looking for a show-stopping dessert, Vampire Fudge is guaranteed to be a crowd-pleaser.
This recipe also offers plenty of room for customization. You can adjust the amount of red food coloring to achieve your desired intensity. You can enhance the cocoa layer with a pinch of espresso powder for a richer, more intense chocolate flavor. You can also experiment with different swirling techniques to create unique patterns. The possibilities are endless!
Ingredients:
- 3 cups white chocolate chips
- 1 can (14 oz) sweetened condensed milk
- Red food coloring
- 1 teaspoon vanilla extract
- 1/4 cup cocoa powder
- 2 tablespoons butter
- 1/2 teaspoon black food coloring (optional for extra darkness)
Preparation:
Step 1: Prepare the Pan
Line an 8×8-inch baking pan with parchment paper. Ensure the parchment paper overhangs the edges of the pan on all sides. This overhang will act as handles, making it incredibly easy to lift the finished fudge out of the pan for cutting. The parchment paper also prevents the fudge from sticking to the bottom of the pan, ensuring a clean and effortless removal. Smooth the parchment paper against the bottom and sides of the pan to minimize wrinkles and ensure an even surface for the fudge. This step is crucial for achieving a clean, professional-looking result.
Step 2: Make the Chocolate Layer
In a medium saucepan, combine 1 1/2 cups of white chocolate chips, 1/2 can (7 oz) of sweetened condensed milk, 1/4 cup of cocoa powder, and 2 tablespoons of butter. Place the saucepan over low heat. It is essential to use low heat to prevent the white chocolate from scorching or seizing. Stir the mixture constantly with a spatula or wooden spoon. As the ingredients heat up, they will begin to melt and blend together. Continue stirring until the mixture is completely smooth and creamy. Be patient and persistent, as it may take a few minutes for the chocolate chips to fully melt. If using, stir in 1/2 teaspoon of black food coloring to deepen the color of the fudge, if you want it darker. Once the mixture is smooth, pour it into the prepared baking pan. Use a spatula to spread the chocolate mixture evenly across the bottom of the pan, creating a uniform layer. Once the layer is spread place it in the refrigerator to chill for 10 minutes. This brief chilling period will help the chocolate layer set slightly, providing a stable base for the red fudge layer.
Step 3: Make the Red Fudge Layer
In another medium saucepan, combine the remaining 1 1/2 cups of white chocolate chips and 1/2 can (7 oz) of sweetened condensed milk. Place the saucepan over low heat. Again, it is crucial to use low heat to prevent the white chocolate from scorching. Stir the mixture constantly until the chocolate chips are completely melted and the mixture is smooth and creamy. This process should take a few minutes. Once the mixture is smooth, remove the saucepan from the heat. Stir in 1 teaspoon of vanilla extract to enhance the flavor of the fudge. Then, add red food coloring, a few drops at a time, until you reach the desired color intensity. Be mindful of how much food coloring you are using, and continue to add drops until you reach your desired shade of red. Stir the mixture well after each addition to ensure the color is evenly distributed.
Step 4: Assemble the Fudge
Remove the baking pan from the refrigerator. The chocolate layer should be firm to the touch. Pour the red fudge mixture evenly over the chocolate layer. Use a spatula to gently spread the red fudge mixture to ensure it covers the entire chocolate layer. Optionally, for a visually stunning marbled effect, use a toothpick or skewer to swirl the red fudge into the chocolate layer. Drag the toothpick or skewer through the red fudge in a swirling motion, being careful not to mix the two layers completely. Experiment with different swirling patterns to create a unique and artistic design.
Step 5: Chill and Serve
Cover the baking pan with plastic wrap or foil. Refrigerate the fudge for at least 2 hours, or preferably overnight, to allow it to set completely. The longer the fudge chills, the firmer it will become, making it easier to cut into squares. Once the fudge is firm, lift it out of the pan using the parchment paper overhang. Place the fudge on a cutting board and use a sharp knife to cut it into squares. The size of the squares is entirely up to your preference. Arrange the fudge squares on a serving platter or store them in an airtight container in the refrigerator.
COOKING Rating:
Easy
Serving Suggestions:
- Serve Vampire Fudge as a standalone dessert for Halloween parties or themed events.
- Pair it with a scoop of vanilla ice cream for a decadent treat.
- Include it in a dessert platter alongside other Halloween-themed sweets.
- Offer it as a homemade gift in decorative boxes or tins.
- Cut into smaller squares and serve as part of a dessert buffet.
Tips:
- Use high-quality white chocolate chips for the best flavor and texture.
- Be careful not to overheat the chocolate when melting, as it can seize and become grainy.
- Adjust the amount of red food coloring to achieve your desired color intensity.
- For a richer chocolate flavor, add a pinch of espresso powder to the cocoa layer.
- Store the fudge in an airtight container in the refrigerator to maintain its freshness.
- Line the pan with foil instead of parchment if you prefer a slightly shiny bottom.
- For a different texture, add chopped nuts or dried fruit to either the chocolate or red layer.
- If you want the fudge to be less sweet, use semi-sweet chocolate chips for the base layer.
Prep Time:
15 minutes
Cook Time:
10 minutes
Total Time:
2 hours 25 minutes (includes chilling time)
Nutritional Information:
(Note: Nutritional information is an estimate and may vary based on specific ingredients used.)
Calories: Approximately 250-300 per serving Protein: 2-3 grams per serving Sodium: 50-70mg per serving
Conclusion
Vampire Fudge is a delightful and visually stunning dessert that’s perfect for any occasion. Its ease of preparation, combined with its rich flavor and dramatic appearance, makes it a guaranteed crowd-pleaser. Whether you’re hosting a Halloween party or simply craving a sweet treat, this recipe is sure to satisfy your desires. So, gather your ingredients, unleash your creativity, and prepare to sink your teeth into this irresistible fudge!
Q&A About Vampire Fudge
Q1: Can I use dark chocolate instead of white chocolate for the base layer?
A: Absolutely! While the recipe calls for white chocolate to create a stark contrast with the red layer, you can definitely substitute it with dark chocolate for a richer, more intense chocolate flavor. This will create a “double chocolate” effect. Keep in mind that using dark chocolate will reduce the visual contrast slightly, but the flavor will be undeniably delicious. Consider adding a pinch of sea salt to the dark chocolate layer to enhance its flavor and balance the sweetness.
Q2: Is there a substitute for sweetened condensed milk?
A: Sweetened condensed milk is crucial for the texture and sweetness of the fudge. However, if you absolutely cannot use it, you can try making a homemade version. Combine equal parts of heavy cream and granulated sugar in a saucepan and simmer over low heat, stirring constantly, until it thickens to the consistency of sweetened condensed milk. However, please note this may not be the same recipe results as using the proper ingredients. The store-bought option is more concentrated and specifically processed. Alternatively, there are vegan condensed milk alternatives available made from coconut or oat milk, these might alter the texture slightly but are a great option if you have dietary restrictions.
Q3: How can I make the red color more vibrant?
A: To achieve a more vibrant red color, use gel food coloring instead of liquid food coloring. Gel food coloring is more concentrated, so you’ll need less to achieve the desired intensity. Start with a few drops and gradually add more until you reach the perfect shade of red. Also, make sure your white chocolate is of high quality, as lower quality white chocolate can sometimes have a yellowish tinge that can affect the color of the red layer. Adding a tiny drop of pink food coloring can also help enhance the redness and counteract any potential yellow undertones.
Q4: Can I add any other ingredients to the fudge?
A: Absolutely! Vampire Fudge is a great base for adding your own creative touches. You can stir chopped nuts (such as walnuts, pecans, or almonds) into the chocolate or red layer for added texture and flavor. Dried cranberries or cherries would also complement the red color and add a tartness that balances the sweetness. For a more decadent twist, try swirling in a layer of peanut butter or Nutella. Be mindful of the amount of added ingredients, as too much can affect the overall texture and consistency of the fudge.
Q5: How long does Vampire Fudge last, and how should I store it?
A: Vampire Fudge can last for up to 1-2 weeks if stored properly in an airtight container in the refrigerator. Ensure the container is tightly sealed to prevent the fudge from drying out. You can also freeze the fudge for up to 2-3 months. Wrap it tightly in plastic wrap and then place it in a freezer-safe bag or container. When ready to serve, thaw the fudge in the refrigerator overnight. Note that freezing may slightly alter the texture, but it will still be delicious. Cutting the fudge into squares before freezing can make it easier to thaw individual portions as needed.