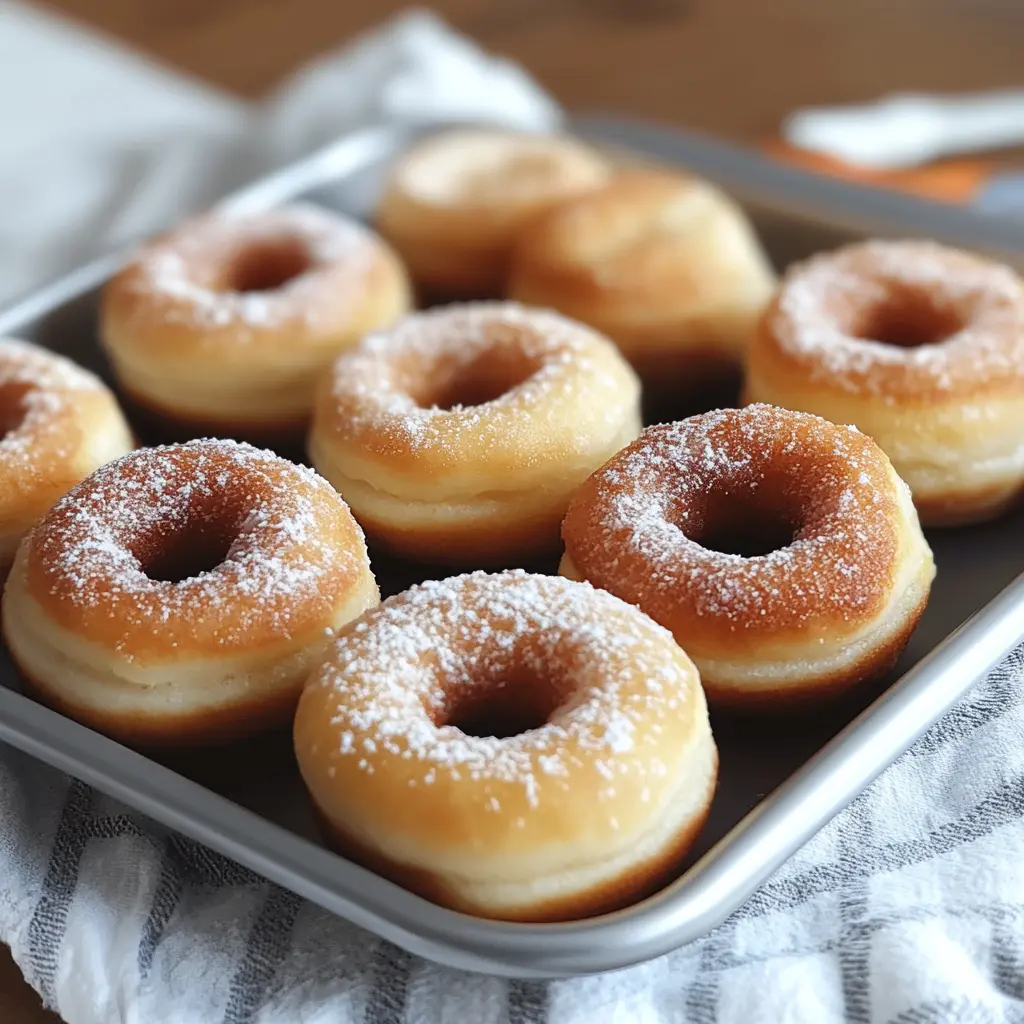
Description of this recipe: These 2-Ingredient Donuts are the ultimate lazy day indulgence. Made with just refrigerated biscuit dough and your choice of glaze (maple syrup or powdered sugar), these donuts are incredibly easy to make and satisfyingly delicious. Perfect for a quick breakfast, a fun snack, or a simple dessert.
Why you will love this recipe: Imagine biting into a warm, soft donut without the fuss of making dough from scratch. This recipe delivers that experience with minimal effort. You’ll love the simplicity, the speed, and the surprisingly good taste. It’s a guaranteed crowd-pleaser, especially for kids and anyone who appreciates a sweet treat without spending hours in the kitchen. Plus, the customizable glaze allows you to tailor the flavor to your exact preferences.
Introduction
In the world of baking, sometimes the simplest recipes are the most rewarding. We often get caught up in elaborate preparations and complex ingredients, forgetting that deliciousness can be achieved with just a few key components. That’s where these 2-Ingredient Donuts come in. This recipe is a testament to the idea that you don’t need a pantry full of specialty items or advanced baking skills to create a delightful and comforting treat.
The beauty of this recipe lies in its accessibility. Most of us have a can of refrigerated biscuit dough lurking in the fridge, ready to be transformed into something extraordinary. By simply adding a touch of creativity and a desire for something sweet, you can turn those humble biscuits into warm, fluffy donuts in a matter of minutes. The possibilities are endless when it comes to the glaze. You can keep it classic with a simple maple syrup glaze, add a touch of elegance with a powdered sugar glaze, or even experiment with other flavors like chocolate, vanilla, or sprinkles.
This recipe is perfect for those moments when you crave a sweet treat but lack the time or energy for a more involved baking project. It’s also a fantastic activity to do with kids, as they can help with cutting out the donut holes, dipping the donuts in the glaze, and adding their favorite toppings. Whether you’re looking for a quick breakfast option, a fun snack for movie night, or a simple dessert to satisfy your sweet tooth, these 2-Ingredient Donuts are sure to hit the spot. So, grab a can of biscuit dough, choose your favorite glaze, and get ready to enjoy the easiest and most satisfying donut experience you’ve ever had! These donuts are sure to bring joy and smiles to everyone around you. The aroma of warm, freshly baked donuts filling your kitchen is an experience in itself, creating a cozy and inviting atmosphere.
Ingredients:
- 1 can refrigerated biscuit dough (8 count) – Choose your favorite brand; flaky or buttermilk biscuits both work well.
- 1/2 cup maple syrup or powdered sugar (for glaze) – For the powdered sugar glaze, you’ll also need a small amount of water or milk (about 1-2 tablespoons) to achieve the desired consistency.
Preparation:
Step 1: Preheat your oven to 350°F (175°C) and lightly grease a donut pan. This ensures that the donuts bake evenly and release easily from the pan. If you don’t have a donut pan, you can bake them on a baking sheet lined with parchment paper. Greasing is essential to prevent sticking. Use cooking spray or a light coating of butter or oil.
Step 2: Open the can of biscuit dough and separate the biscuits. Gently peel apart the individual biscuits without tearing them. This will ensure that they bake evenly and create a nice, rounded donut shape.
Step 3: Use a small round cutter to make a hole in the center of each biscuit to form the donut shape. A small cookie cutter, a piping tip, or even the cap of a soda bottle can work as a donut hole cutter. Carefully press the cutter into the center of each biscuit and remove the donut hole. Save the donut holes! You can bake them alongside the donuts for an extra little treat or even deep fry them for “donut hole” style delights!
Step 4: Place the donut shapes into the prepared donut pan. Arrange the donut shapes evenly in the pan, ensuring that they have enough space to expand during baking. If you’re using a baking sheet, leave about an inch of space between each donut to prevent them from sticking together. This allows for even cooking and optimal air circulation.
Step 5: Bake for 8-10 minutes or until golden brown and cooked through. Keep a close eye on the donuts while they’re baking, as they can burn quickly. The baking time may vary depending on your oven, so check for doneness by inserting a toothpick into the center of a donut. If it comes out clean, the donuts are ready. A light golden-brown color indicates that they are perfectly baked and ready to be enjoyed.
Step 6: While the donuts bake, prepare the glaze. For a warm maple syrup glaze, simply heat the maple syrup in a saucepan over low heat until warmed through. Do not boil. For a powdered sugar glaze, mix powdered sugar with water (or milk) until the desired consistency is reached. Start with a small amount of liquid and add more gradually until you achieve a smooth, pourable glaze. Feel free to add a touch of vanilla extract or lemon juice for extra flavor.
Step 7: Once baked, remove the donuts from the pan and let them cool for a few minutes. Allowing the donuts to cool slightly before glazing will prevent the glaze from melting off completely. However, glazing them while they’re still warm will help the glaze adhere better.
Step 8: Dip the warm donuts into the glaze or drizzle it on top, then serve and enjoy! Dip each donut into the glaze, ensuring that it is fully coated. Alternatively, you can drizzle the glaze over the donuts for a more rustic look. Add sprinkles, chopped nuts, or other toppings for extra flair. Serve the donuts immediately for the best taste and texture.
COOKING Rating:
- Ease of Preparation: Extremely Easy
- Taste: Delicious and surprisingly satisfying
- Kid-Friendly: Yes, a fun and easy activity to do with kids
- Overall Rating: 5/5 Stars – A must-try for its simplicity and taste!
Serving Suggestions:
- Serve warm with a cup of coffee or tea for breakfast.
- Enjoy as a quick and easy snack anytime of day.
- Serve as a simple dessert after a light meal.
- Add a scoop of vanilla ice cream for a decadent treat.
- Pair with fresh fruit for a balanced and satisfying snack.
Tips:
- For a richer flavor, use buttermilk biscuits instead of flaky biscuits.
- Experiment with different glazes, such as chocolate, vanilla, or lemon.
- Add sprinkles, chopped nuts, or other toppings for extra flavor and visual appeal.
- To prevent the donuts from becoming soggy, glaze them just before serving.
- Store leftover donuts in an airtight container at room temperature for up to 2 days.
Prep Time:
5 minutes
Cook Time:
8-10 minutes
Total Time:
13-15 minutes
Nutritional Information:
(Approximate values per donut, excluding glaze)
- Calories: 150-200
- Protein: 2-3g
- Sodium: 250-300mg
(Note: Nutritional information will vary depending on the brand of biscuit dough and the type of glaze used.)
Conclusion
These 2-Ingredient Donuts are a testament to the fact that you don’t need a lot of time or ingredients to create a delicious and satisfying treat. With just a can of refrigerated biscuit dough and your choice of glaze, you can whip up a batch of warm, fluffy donuts in minutes. This recipe is perfect for busy mornings, lazy weekends, or any time you’re craving a sweet treat without the fuss. So, go ahead and give it a try – you won’t be disappointed! This recipe is sure to become a staple in your kitchen for its simplicity, convenience, and irresistible taste.
Questions and Answers about this Recipe:
Q1: Can I use gluten-free biscuit dough for this recipe?
A: Absolutely! While the traditional recipe uses regular biscuit dough, there are several gluten-free biscuit dough options available in the market. Just make sure to check the baking instructions on the packaging, as they may differ slightly from regular biscuit dough. Keep a close eye on the cooking process; gluten free dough tends to bake a little differently so adjustment might be needed. You may need to experiment with the baking time to achieve the perfect golden-brown color and a thoroughly cooked center. Also, gluten-free dough can sometimes be a bit drier, so consider adding a touch of extra moisture to the glaze for a more delightful and tender donut experience.
Q2: What other glaze options can I use besides maple syrup and powdered sugar?
A: The possibilities are endless! You can try a chocolate glaze made with melted chocolate chips and a little milk, a vanilla glaze made with powdered sugar, vanilla extract, and milk, or a lemon glaze made with powdered sugar and lemon juice. You could also experiment with flavored extracts like almond or peppermint. Get creative and have fun with it! Consider a cinnamon-sugar coating if you prefer a less sweet option. For an extra touch of elegance, try making a salted caramel glaze by melting sugar and adding butter, cream, and a pinch of salt. You can even use store-bought frosting for an even quicker and easier option. No matter what you choose, make sure the glaze complements the taste of the donut.
Q3: Can I bake these donuts in an air fryer instead of an oven?
A: Yes, you can! Preheat your air fryer to 350°F (175°C) and place the donut shapes in the air fryer basket, making sure they’re not overcrowded. Air fry for 5-7 minutes, or until golden brown and cooked through. Keep a close eye on them, as air fryers can cook quickly. Air fryers tend to produce a crispier exterior, which many people find appealing. Be sure to grease the air fryer basket to prevent sticking. You may need to adjust the cooking time depending on your specific air fryer model. Always check for doneness by inserting a toothpick into the center of a donut.
Q4: Can I make these donuts ahead of time?
A: While these donuts are best enjoyed fresh, you can make them ahead of time and store them in an airtight container at room temperature for up to 2 days. However, keep in mind that they may lose some of their softness and freshness over time. To refresh them, you can warm them in the oven or microwave for a few seconds before serving. It’s best to glaze the donuts just before serving to prevent them from becoming soggy.
Q5: What can I do with the leftover donut holes?
A: Don’t throw them away! Bake them alongside the donuts and dip them in the glaze for a fun and bite-sized treat. You can also deep fry them for a “donut hole” style delight. Or, try tossing them with cinnamon sugar for a simple and delicious snack. Alternatively, you can use them as toppings for ice cream or yogurt. For a more creative option, use them to make a bread pudding or add them to your morning oatmeal. There are countless ways to enjoy those little donut holes, so get creative and have fun!