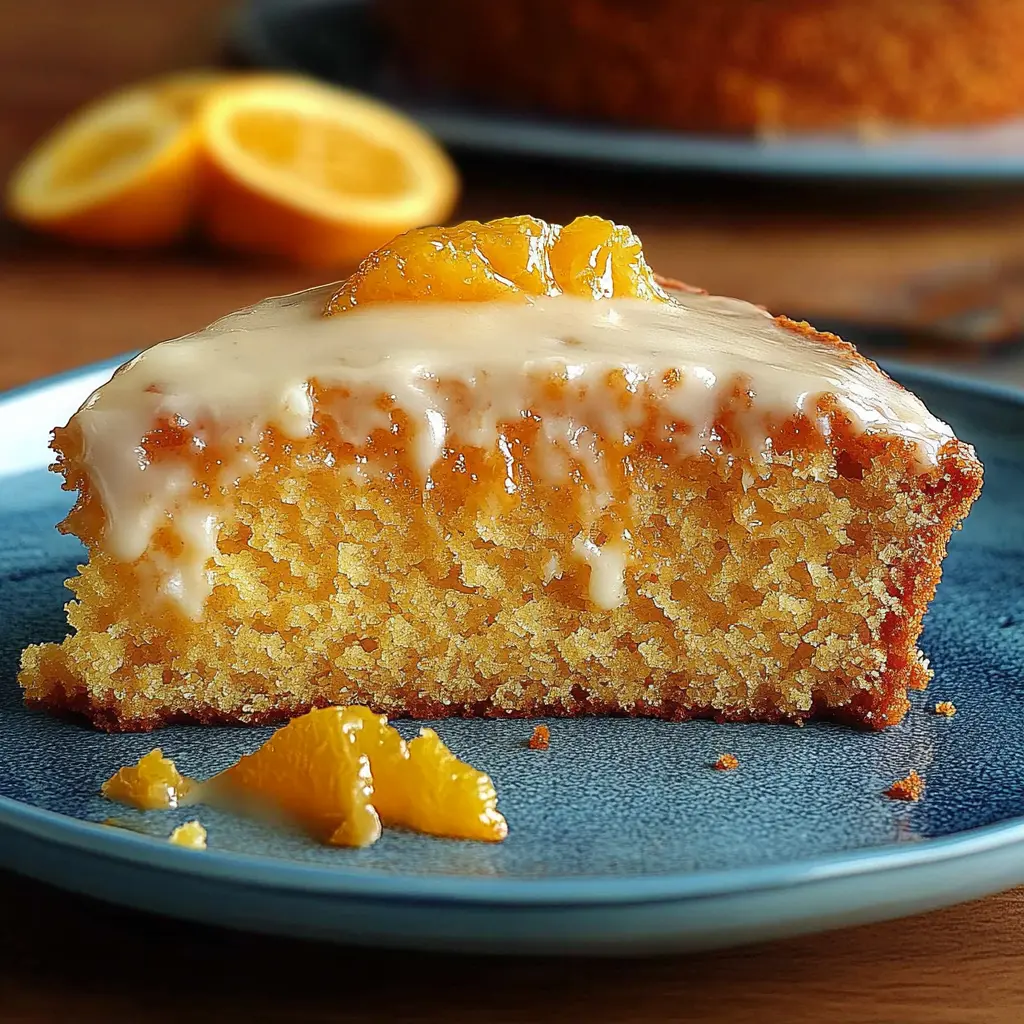
Description of this recipe: This Easiest Softest Orange Blender Cake is a delightful citrus-infused dessert that requires minimal effort but delivers maximum flavor. The secret lies in blending the entire orange, peel and all, which imparts a vibrant and aromatic essence to the cake. With a tender crumb and a burst of fresh orange flavor, this cake is perfect for any occasion, from a simple afternoon treat to a celebratory gathering. The recipe utilizes simple pantry staples and a straightforward method, making it accessible to bakers of all skill levels.
Why you will love this recipe: You’ll fall in love with this Orange Blender Cake for its simplicity and the incredible burst of citrus flavor. The blender method eliminates the need for creaming butter and sugar, saving you time and effort. The inclusion of the orange peel adds a depth of flavor and aroma that elevates the cake beyond ordinary citrus desserts. The result is a moist, tender, and incredibly flavorful cake that is sure to impress. Whether you’re a seasoned baker or just starting out, this recipe is a guaranteed success. Plus, the vibrant orange color and zesty aroma will fill your kitchen with a delightful ambiance, making the baking experience as enjoyable as the cake itself.
Ingredients:
- 1 medium orange (peeled, seeds removed, roughly chopped)
- 1 tablespoon orange zest (from the same orange)
- 100g (1/2 cup) granulated sugar
- 60g (1/4 cup) unsalted butter, melted (or vegetable oil)
- 2 large eggs
- 200g (1 1/2 cups + 2 tablespoons) self-raising flour
- 1/2 teaspoon vanilla extract
- Pinch of salt
- Optional: powdered sugar for dusting
Preparation:
Step 1: Prepare the Orange Mixture Begin by thoroughly washing the orange. Peel the orange, removing the skin and any white pith, as the pith can be bitter. Chop the peeled orange into smaller pieces, ensuring all seeds are removed. In a blender, combine the chopped orange, orange zest, sugar, melted butter (or oil), and eggs. Blend until the mixture is completely smooth and creamy. This process ensures that the orange flavor is evenly distributed throughout the cake batter.
Step 2: Combine Wet and Dry Ingredients Pour the blended orange mixture into a mixing bowl. Add the self-raising flour and a pinch of salt. Gently mix the ingredients together using a spatula or wooden spoon. It is crucial to mix in one direction to avoid overmixing the batter, which can result in a tough cake. Mix until the flour is just incorporated, and there are no visible streaks of flour remaining.
Step 3: Add Vanilla Extract Add the vanilla extract to the batter and gently fold it in until it is evenly distributed. The vanilla extract enhances the overall flavor profile of the cake, adding a touch of warmth and complexity.
Step 4: Prepare the Baking Pan Preheat your oven to 170°C (340°F). Grease a 7-inch round cake pan with butter or cooking spray to prevent the cake from sticking. Line the bottom of the pan with a circle of parchment paper for added insurance. This ensures that the cake will release easily from the pan after baking.
Step 5: Bake the Cake Pour the batter into the prepared cake pan. Gently tap the pan on the counter to release any trapped air bubbles. Place the cake pan in the preheated oven and bake for 30-40 minutes, or until a wooden skewer inserted into the center of the cake comes out clean. The baking time may vary depending on your oven, so it is essential to check the cake periodically.
Step 6: Cool and Serve Once the cake is baked, remove it from the oven and let it cool in the pan for about 10-15 minutes. This allows the cake to firm up slightly before removing it from the pan. After cooling for the specified time, invert the cake onto a wire rack and remove the parchment paper. Let the cake cool completely on the wire rack before slicing and serving. Dust with powdered sugar for an elegant finishing touch, if desired.
COOKING Rating: Easy
Serving Suggestions: This Orange Blender Cake is incredibly versatile and can be enjoyed in numerous ways. Serve it as a delightful afternoon treat with a cup of tea or coffee. For a more decadent dessert, pair it with a scoop of vanilla ice cream or a dollop of whipped cream. You can also drizzle it with a simple glaze made from powdered sugar and orange juice for an extra burst of citrus flavor. Consider serving it as part of a brunch spread alongside fresh fruits and yogurt. The cake also makes a wonderful addition to a dessert buffet or a potluck gathering.
Tips:
- Use a ripe, juicy orange for the best flavor.
- Make sure to remove all seeds from the orange before blending.
- Do not overmix the batter, as this can result in a tough cake.
- If you don’t have self-raising flour, you can make your own by combining 1 cup of all-purpose flour with 1 1/2 teaspoons of baking powder and 1/4 teaspoon of salt.
- For a richer flavor, use browned butter instead of melted butter. To make browned butter, melt the butter in a saucepan over medium heat. Continue cooking until the butter turns a nutty brown color and has a fragrant aroma.
- Add a handful of chopped nuts, such as walnuts or pecans, to the batter for added texture and flavor.
- Store leftover cake in an airtight container at room temperature for up to 3 days.
Prep Time: 15 minutes Cook Time: 30-40 minutes Total Time: 45-55 minutes
Nutritional Information: (per serving, estimated) Calories: 250 Protein: 4g Sodium: 150mg
Conclusion This Easiest Softest Orange Blender Cake is a testament to the fact that delicious desserts don’t have to be complicated. With its simple ingredients, straightforward method, and incredible orange flavor, this cake is sure to become a family favorite. Whether you’re baking for a special occasion or just craving a sweet treat, this recipe is a guaranteed crowd-pleaser. So gather your ingredients, fire up your blender, and get ready to enjoy the most flavorful and effortless orange cake you’ve ever tasted. The vibrant citrus notes and tender crumb will leave you wanting more, making it a perfect choice for any time of day.
Questions and Answers about this Recipe:
Q1: Can I use a different type of orange for this recipe? A: Yes, you can use different types of oranges for this recipe, but keep in mind that the flavor profile will vary depending on the variety. Navel oranges are a good option for their sweetness and mild flavor. Blood oranges will add a beautiful color and a slightly tart taste. Clementines and tangerines are also suitable choices, offering a sweeter and more delicate flavor. Experiment with different varieties to find your favorite combination.
Q2: Can I make this cake gluten-free? A: Yes, you can make this cake gluten-free by substituting the self-raising flour with a gluten-free self-raising flour blend. Ensure that the gluten-free flour blend contains xanthan gum or another binding agent to help provide structure to the cake. Follow the recipe as directed, and you’ll have a delicious gluten-free orange cake.
Q3: Can I freeze this cake? A: Yes, you can freeze this cake for longer storage. Allow the cake to cool completely before wrapping it tightly in plastic wrap, followed by a layer of aluminum foil. Freeze for up to 2-3 months. When ready to serve, thaw the cake in the refrigerator overnight or at room temperature for a few hours. The texture may be slightly different after freezing, but the flavor will remain delicious.
Q4: Can I add a glaze to this cake? A: Absolutely! A simple orange glaze can elevate this cake to another level. To make the glaze, whisk together 1 cup of powdered sugar with 2-3 tablespoons of fresh orange juice until smooth. You can also add a teaspoon of orange zest for an extra burst of flavor. Drizzle the glaze over the cooled cake, allowing it to drip down the sides. The glaze will add sweetness and enhance the citrus notes of the cake.
Q5: What can I do if my cake is browning too quickly in the oven? A: If your cake is browning too quickly in the oven, you can tent it with a piece of aluminum foil. Simply place a sheet of foil loosely over the cake pan to shield it from the direct heat. This will help to prevent the top of the cake from burning while allowing the inside to continue baking evenly. Alternatively, you can lower the oven temperature by 10-15 degrees and extend the baking time slightly.