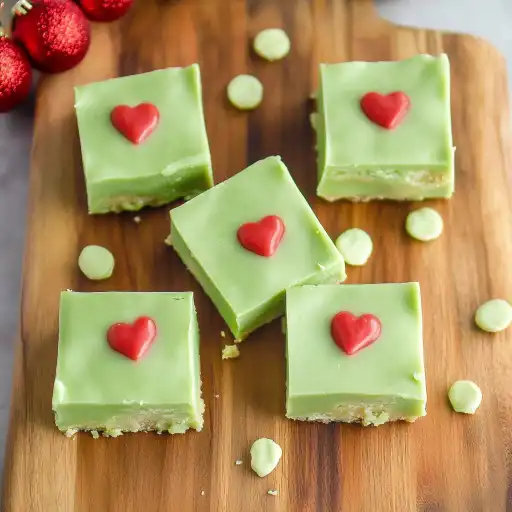
This Easy Grinch Fudge recipe is a delightful, no-bake treat perfect for the holiday season! With its vibrant green color and adorable heart sprinkles, it’s a festive dessert that everyone will love. This fudge is incredibly simple to make, requiring only a few ingredients and minimal effort, making it ideal for busy holiday schedules.
Why You Will Love This Recipe
You’ll fall in love with this Grinch Fudge because it’s:
- Easy and Quick: No baking required! This recipe comes together in minutes, making it perfect for last-minute gatherings or when you need a sweet treat in a hurry.
- Festive and Fun: The bright green color and heart sprinkles make it a cheerful addition to any Christmas dessert spread.
- Deliciously Sweet: The combination of white chocolate and sweetened condensed milk creates a rich, creamy, and melt-in-your-mouth fudge that’s simply irresistible.
- Customizable: Easily adjust the shade of green and the type of sprinkles to suit your preferences and make it your own.
- Kid-Friendly: Children will enjoy helping to make and decorate this fudge, making it a fun activity for the whole family.
Ingredients:
- 2 ⅔ cups (16 ounces) white chocolate chips (good quality for better melting)
- 1 can (14 ounces) sweetened condensed milk
- Few drops green food coloring (gel food coloring works best for vibrant color)
- 25 heart sprinkles (red heart sprinkles are ideal)
- Pinch of kosher salt (optional, but enhances flavor)
Preparation:
This no-bake fudge comes together so quickly! Here are the steps to Grinch-approved perfection:
Step 1: Prepare Pan
Line an 8-inch square baking pan with lightly-greased parchment paper or non-stick foil, leaving an overhang on the sides. The parchment paper or foil makes removing the fudge super easy. Lightly greasing the paper helps the fudge release cleanly. Set the pan aside.
Step 2: Melt White Chocolate
Pour the white chocolate chips into a microwave-safe bowl. Microwave at 70 percent power for 90 seconds. This lower power setting helps prevent the chocolate from burning or seizing. Remove from the microwave and stir well. The residual heat should continue to melt the chocolate. If necessary, microwave in additional 15-second intervals, stirring after each, until the chocolate is completely smooth and fully melted. Be extra careful not to overheat the white chocolate, as it can become grainy and unusable.
Step 3: Combine with Condensed Milk
Add the sweetened condensed milk to the melted white chocolate. Stir until the mixture is completely smooth and well combined. The sweetened condensed milk adds sweetness, creaminess, and helps the fudge set properly. If desired, stir in a small pinch of kosher salt at this point. The salt enhances the flavor and balances the sweetness, creating a more complex flavor profile.
Step 4: Color the Fudge
Now for the fun part! Add a few drops of green food coloring to the fudge mixture. Stir very well until you achieve your desired shade of Grinch-green. Gel food coloring often provides the most vibrant results without thinning the fudge, but liquid food coloring will also work. Start with a few drops and add more gradually until you reach the perfect Grinch-like hue.
Step 5: Pour & Decorate
Pour the vibrant green fudge mixture into the prepared pan, spreading it evenly with a spatula. Make sure the fudge is distributed uniformly across the pan for even setting and consistent squares. Immediately place the heart sprinkles on top. For a neat presentation of 25 pieces, arrange the hearts in 5 rows and 5 columns, with one heart per intended fudge square. Gently press the hearts into the fudge so they adhere but don’t sink too deeply.
Step 6: Chill & Cut
Chill the fudge in the refrigerator until it is well set, which usually takes about 4 hours, but preferably longer. The fudge needs ample time to firm up for easy cutting. Once the fudge is firm, use the parchment paper/foil overhang to lift it out of the pan. Place the fudge on a cutting board. Use a sharp knife to cut the fudge into squares, ensuring each square has one heart sprinkle in its center. For clean, professional-looking edges, warm the knife under hot water and dry it off between slices. This helps the knife glide through the fudge without dragging.
COOKING Rating:
- Ease of Recipe: 5/5 (Super easy)
- Taste: 5/5 (Delicious!)
- Festiveness: 5/5 (Perfect for Christmas)
- Overall: 5/5
Serving Suggestions:
- Serve the Grinch Fudge as part of a Christmas dessert platter alongside cookies, brownies, and other festive treats.
- Package individual squares of fudge in small cellophane bags tied with ribbon for easy gifting to friends, family, and neighbors.
- Offer the fudge as a sweet treat at holiday parties or gatherings.
- Enjoy a square with a cup of hot cocoa or coffee for a cozy winter treat.
- Crumble the fudge and use it as a topping for ice cream or yogurt.
Tips:
- Use good quality white chocolate chips for a smoother melt and better flavor. Cheaper white chocolate chips may not melt as smoothly and can have a waxy texture.
- Avoid overcooking the chocolate – melt it low and slow. Overheated white chocolate can seize and become grainy.
- Press the hearts gently so they don’t sink too deep into the fudge. You want them to be visible and not submerged in the green fudge.
- Cut with a warm knife for clean edges – just run it under hot water and dry it off between slices. This helps the knife glide through the fudge without tearing it.
- If you’re short on time, you can chill the fudge in the freezer for about an hour to speed up the setting process. Just be sure to transfer it to the refrigerator to soften slightly before cutting.
- For a more intense green color, use gel food coloring instead of liquid food coloring. Gel food coloring is more concentrated and won’t thin out the fudge as much.
- Store the fudge in an airtight container in the refrigerator for up to a week.
Prep Time:
- 10 minutes
Cook Time:
- 5 minutes (for melting chocolate)
Total Time:
- 15 minutes (plus 4 hours chilling time)
Nutritional Information:
(Note: Nutritional information is approximate and can vary based on specific ingredients and portion sizes.)
Calories:
- Approximately 180-220 per square
Protein:
- Approximately 2 grams per square
Sodium:
- Approximately 20-30 mg per square
Conclusion
This Easy Grinch Fudge is a delightful and festive treat that’s perfect for celebrating the holiday season. Its simple ingredients and no-bake preparation make it a stress-free dessert option for busy schedules. The vibrant green color and adorable heart sprinkles add a touch of whimsy to any Christmas dessert spread, and its rich, creamy flavor is sure to delight both kids and adults alike. Whether you’re looking for a quick and easy treat to bring to a holiday party, a fun activity to do with the kids, or a sweet gift to share with loved ones, this Grinch Fudge is the perfect choice. So gather your ingredients, get ready to spread some holiday cheer, and enjoy this delicious and festive fudge!
Questions and Answers About This Recipe
Q1: Can I use milk chocolate instead of white chocolate?
A: While the recipe is designed for white chocolate to achieve the vibrant green color, you could experiment with milk chocolate. However, the green food coloring will likely result in a less intense, more muted shade. The taste will also be different, with a richer, more chocolatey flavor.
Q2: What if I don’t have heart sprinkles?
A: No problem! You can use any type of sprinkles you like. Red and green sprinkles would be festive, or you could use star sprinkles, candy canes, or any other holiday-themed sprinkles.
Q3: Can I add other ingredients to the fudge?
A: Absolutely! Feel free to get creative. You could add chopped nuts, crushed peppermint candies, mini marshmallows, or even a swirl of red food coloring for a candy cane effect.
Q4: How do I prevent the white chocolate from seizing?
A: The key is to melt the white chocolate low and slow. Use 70% power in the microwave and stir frequently. If you prefer, you can melt the chocolate in a double boiler over simmering water. Just be sure the bowl doesn’t touch the water.
Q5: How long does the fudge last?
A: Stored in an airtight container in the refrigerator, the fudge will last for up to a week. For longer storage, you can freeze it for up to a month. Just be sure to thaw it in the refrigerator before serving.