Description of this Recipe
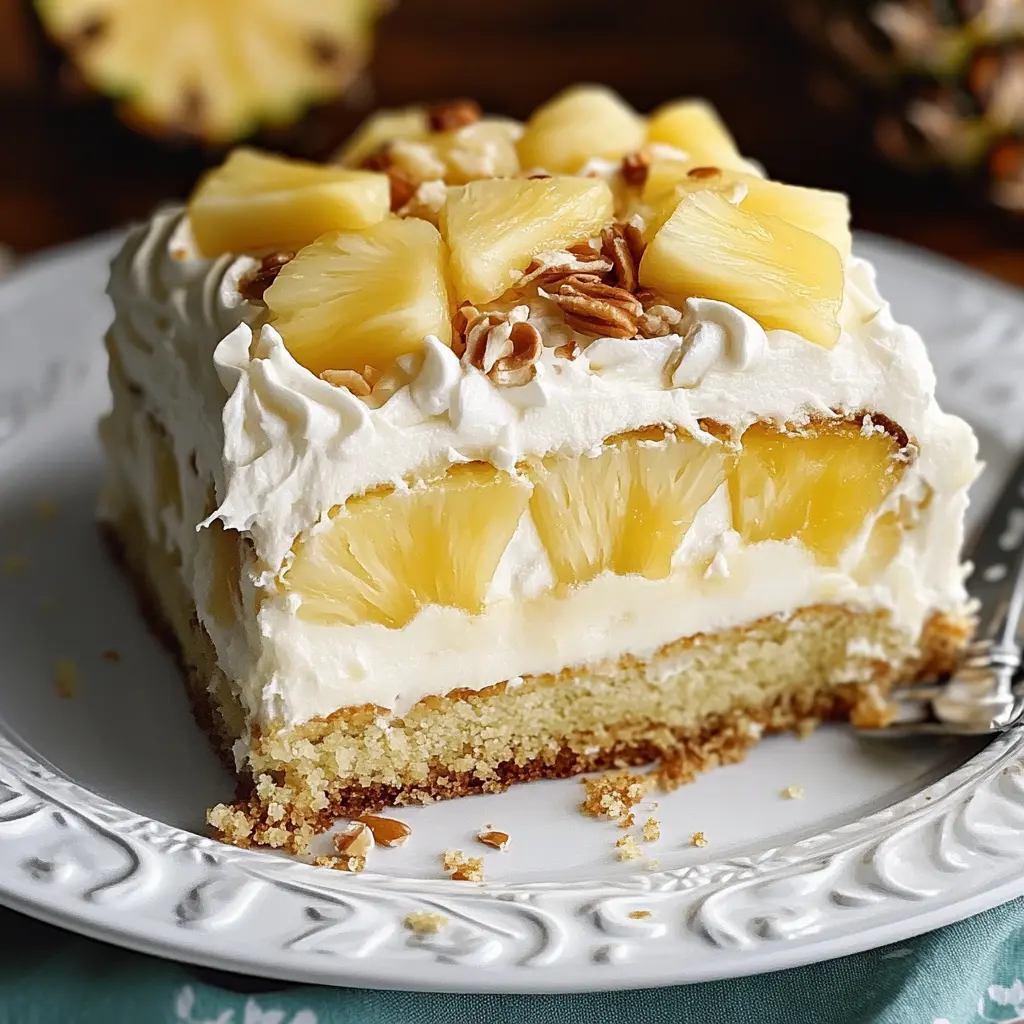
This Hawaiian Pineapple Cake is a moist, delicious, and surprisingly simple dessert that’s bursting with tropical flavors. The combination of sweet pineapple, a hint of vanilla, and a rich cream cheese frosting makes this cake a crowd-pleaser for any occasion. Whether it’s a summer barbecue, a potluck gathering, or just a sweet treat for the family, this cake is sure to be a hit. It’s easy to make, requiring no fancy techniques or hard-to-find ingredients, and it delivers an incredible flavor experience that will transport your taste buds to the islands.
Why You Will Love This Recipe
You will absolutely adore this Hawaiian Pineapple Cake because of its effortless charm and irresistible taste. First and foremost, the moistness of this cake is unparalleled. The undrained crushed pineapple ensures that every bite is succulent and tender. Second, the creamy frosting is the perfect complement to the tanginess of the pineapple, creating a delightful balance of sweet and tart. Third, it’s incredibly versatile. You can customize it with your favorite nuts, coconut flakes, or even a sprinkle of brown sugar on top before baking for a caramelized effect. Fourth, it’s a forgiving recipe that’s easy to adapt to your own preferences. Finally, the simplicity of the recipe means you can whip it up in no time, making it ideal for last-minute gatherings or when you’re craving something sweet without spending hours in the kitchen. This cake is a testament to how simple ingredients, when combined correctly, can create something truly extraordinary.
Introduction
The allure of tropical flavors is undeniable, and this Hawaiian Pineapple Cake captures that essence perfectly. This cake is more than just a dessert; it’s an experience. The sweet, tangy pineapple combined with the rich, creamy frosting creates a harmonious blend of textures and flavors that will leave you wanting more. This recipe is designed for both novice bakers and seasoned pros alike. It’s straightforward, forgiving, and yields a consistently delicious result. The key to this cake’s success lies in using crushed pineapple with its juice, ensuring maximum moisture and flavor throughout. So, gather your ingredients, preheat your oven, and let’s embark on this culinary journey to create a slice of paradise right in your own kitchen.
Ingredients:
- For the Cake:
- 2 cups all-purpose flour: Provides the structure and body of the cake. Ensure it’s fresh for the best rise.
- 2 cups sugar: Adds sweetness and helps to tenderize the cake, contributing to its moist texture.
- 2 large eggs: Bind the ingredients together, add richness, and contribute to the cake’s structure.
- 1 teaspoon baking soda: Acts as a leavening agent, helping the cake to rise and become light and fluffy.
- 1 teaspoon vanilla extract: Enhances the overall flavor profile, adding warmth and depth.
- Pinch of salt: Balances the sweetness and enhances the other flavors in the cake.
- 1 (20-ounce) can crushed pineapple in juice (undrained): This is the star ingredient, providing moisture and the signature pineapple flavor. Using it undrained is crucial for the cake’s moistness.
- 1 cup chopped nuts (optional): Adds texture and nutty flavor. Walnuts, pecans, or macadamia nuts work particularly well.
- For the Frosting:
- 1/2 cup unsalted butter, softened: Adds richness and creaminess to the frosting. Make sure it is softened to room temperature for easy mixing.
- 1 (8-ounce) package cream cheese, softened: Provides the tangy flavor and creamy texture that makes cream cheese frosting so irresistible. Softening is essential for a smooth frosting.
- 1 teaspoon vanilla extract: Enhances the flavor of the frosting, adding warmth and complexity.
- 1 1/2 cups confectioners’ sugar: Sweetens the frosting and gives it its smooth, spreadable consistency. Sift it before using to avoid lumps.
- Garnish (optional):
- Coconut flakes or additional nuts: For added texture and visual appeal. Toasted coconut flakes add a wonderful flavor and crunch.
Preparation:
Step 1: Preheat the Oven and Prepare the Pan
- Preheat your oven to 350°F (175°C). This ensures even baking and prevents the cake from being undercooked or overcooked.
- Grease a 9×13-inch baking pan thoroughly. This is a crucial step to prevent the cake from sticking to the pan. You can use butter, shortening, or cooking spray. For extra insurance, you can also dust the greased pan with flour. The flour creates a barrier between the cake batter and the pan, making it easier to remove the cake once it’s baked.
- Consider lining the bottom of the pan with parchment paper. This is especially helpful if you want to ensure a clean release and easy cleanup. Cut a piece of parchment paper to fit the bottom of the pan, leaving a slight overhang on the sides for easy lifting.
Step 2: Combine the Cake Ingredients
- In a large bowl, combine the dry and wet ingredients. This includes 2 cups of all-purpose flour, 2 cups of sugar, 2 large eggs, 1 teaspoon of baking soda, 1 teaspoon of vanilla extract, and a pinch of salt.
- Add the crushed pineapple (with juice) to the bowl. Do not drain the pineapple, as the juice is essential for the cake’s moistness. The juice not only adds flavor but also helps to keep the cake tender and prevents it from drying out during baking.
- Mix the ingredients well. Use a whisk or a hand mixer to combine the ingredients until they are just incorporated. Be careful not to overmix the batter, as this can lead to a tough cake. Overmixing develops the gluten in the flour, resulting in a dense and chewy texture. Mix until the batter is smooth and there are no visible lumps.
Step 3: Fold in the Nuts (Optional)
- If you’re using nuts, gently fold them into the batter. Folding means using a spatula to gently incorporate the nuts without deflating the batter. This technique helps to distribute the nuts evenly throughout the cake while maintaining its light and airy texture.
- Choose your nuts wisely. Walnuts, pecans, or macadamia nuts all work well in this cake. Toasting the nuts beforehand can enhance their flavor and add a pleasant crunch.
- Don’t overdo it with the nuts. While they add a nice texture and flavor, too many nuts can make the cake heavy. A cup of chopped nuts is usually the perfect amount.
Step 4: Bake the Cake
- Pour the batter into the prepared pan. Spread the batter evenly in the pan to ensure that the cake bakes uniformly.
- Bake for 35-40 minutes, or until a toothpick comes out clean. Insert a toothpick into the center of the cake. If it comes out clean or with a few moist crumbs, the cake is done. If it comes out with wet batter, continue baking for a few more minutes and check again.
- Keep an eye on the cake as it bakes. Ovens can vary, so it’s important to monitor the cake’s progress. If the top starts to brown too quickly, you can tent it with foil to prevent it from burning.
- Once the cake is baked, remove it from the oven and let it cool in the pan for about 10 minutes before frosting.
Step 5: Prepare and Apply the Frosting
- While the cake is baking, prepare the frosting. In a large bowl, beat the softened butter, softened cream cheese, and vanilla extract until smooth and creamy. Make sure both the butter and cream cheese are at room temperature for easy mixing. This will prevent lumps from forming in the frosting.
- Gradually mix in the confectioners’ sugar. Add the confectioners’ sugar a little at a time, beating on low speed until it is fully incorporated. This will prevent the sugar from flying all over the place. Continue beating until the frosting is smooth and fluffy.
- Spread the frosting over the warm cake. Spread the frosting evenly over the cake while it is still slightly warm. This will help the frosting to melt slightly and adhere to the cake.
- Garnish with coconut or nuts, if desired. Sprinkle coconut flakes or chopped nuts over the frosting for added texture and visual appeal. Toasted coconut flakes add a wonderful flavor and crunch.
- Let the cake cool completely before slicing and serving. This will allow the frosting to set and the cake to cool down, making it easier to slice and serve.
COOKING Rating:
Easy
Serving Suggestions:
- Serve the cake chilled or at room temperature.
- Pair with a scoop of vanilla ice cream or a dollop of whipped cream.
- Serve with fresh pineapple slices or other tropical fruits.
- Enjoy with a cup of coffee or tea.
Tips:
- Ensure the pineapple is well distributed throughout the batter.
- Do not overbake the cake to prevent it from drying out.
- Softening the butter and cream cheese is crucial for smooth frosting.
- Sift the confectioners’ sugar to prevent lumps in the frosting.
- For a richer flavor, use brown sugar in the cake batter.
Prep Time: 15 minutes Cook Time: 35-40 minutes Total Time: 50-55 minutes
Nutritional Information: (Estimated, per serving, without optional nuts and garnish) Calories: 350-400 Protein: 4g Sodium: 200mg
Conclusion
This Hawaiian Pineapple Cake is a testament to the beauty of simple baking. With its moist texture, tropical flavors, and creamy frosting, it’s a dessert that’s sure to impress. Whether you’re baking for a special occasion or just want to treat yourself, this cake is a delightful choice that will bring a taste of the islands to your table. The ease of preparation makes it accessible for all skill levels, and the versatility of the recipe allows you to customize it to your liking. So, go ahead and give it a try – you won’t be disappointed!
Questions and Answers about This Recipe
Q1: Can I use fresh pineapple instead of canned?
A: While canned crushed pineapple is recommended for its moisture content and convenience, you can use fresh pineapple if you prefer. Make sure to finely chop the pineapple into small pieces, similar to the consistency of crushed pineapple. Be aware that fresh pineapple may not provide as much moisture as the canned version, so you might need to add a tablespoon or two of pineapple juice or milk to the batter to compensate. Also, keep in mind that fresh pineapple contains an enzyme that can prevent the cake from rising properly, so you might want to cook the pineapple slightly before adding it to the batter.
Q2: Can I make this cake ahead of time?
A: Absolutely! This Hawaiian Pineapple Cake is perfect for making ahead of time. You can bake the cake a day or two in advance, wrap it tightly in plastic wrap, and store it at room temperature or in the refrigerator. Prepare the frosting separately and store it in an airtight container in the refrigerator. When you’re ready to serve the cake, simply frost it and garnish as desired. Making it ahead of time allows the flavors to meld together, resulting in an even more delicious cake.
Q3: Can I freeze this cake?
A: Yes, this cake freezes well. Allow the cake to cool completely after baking. Wrap it tightly in plastic wrap, then wrap it again in aluminum foil or place it in a freezer-safe container. Freeze for up to 2-3 months. When ready to serve, thaw the cake in the refrigerator overnight. Frost the cake after it has thawed completely. Note that the texture of the frosting may change slightly after freezing, but the overall flavor will remain delicious.
Q4: What can I substitute for the cream cheese frosting?
A: If you’re not a fan of cream cheese frosting, there are several alternatives you can use. A simple buttercream frosting is a great option. You can also make a pineapple glaze by combining confectioners’ sugar with pineapple juice and a touch of vanilla extract. Another delicious option is a whipped cream frosting, which is light and airy and pairs perfectly with the tropical flavors of the cake. For a healthier alternative, you can use a Greek yogurt frosting by combining Greek yogurt with honey and vanilla extract.
Q5: Can I add other fruits to this cake?
A: Absolutely! This cake is very versatile, and you can easily add other fruits to complement the pineapple flavor. Consider adding shredded coconut, mandarin oranges, maraschino cherries, or even chopped mango. These fruits will add extra flavor and texture to the cake. Just make sure not to add too much fruit, as it can make the cake soggy. A cup or two of additional fruit is usually the perfect amount. You can also add a layer of fruit filling between the cake and the frosting for an extra burst of flavor.