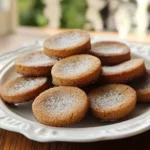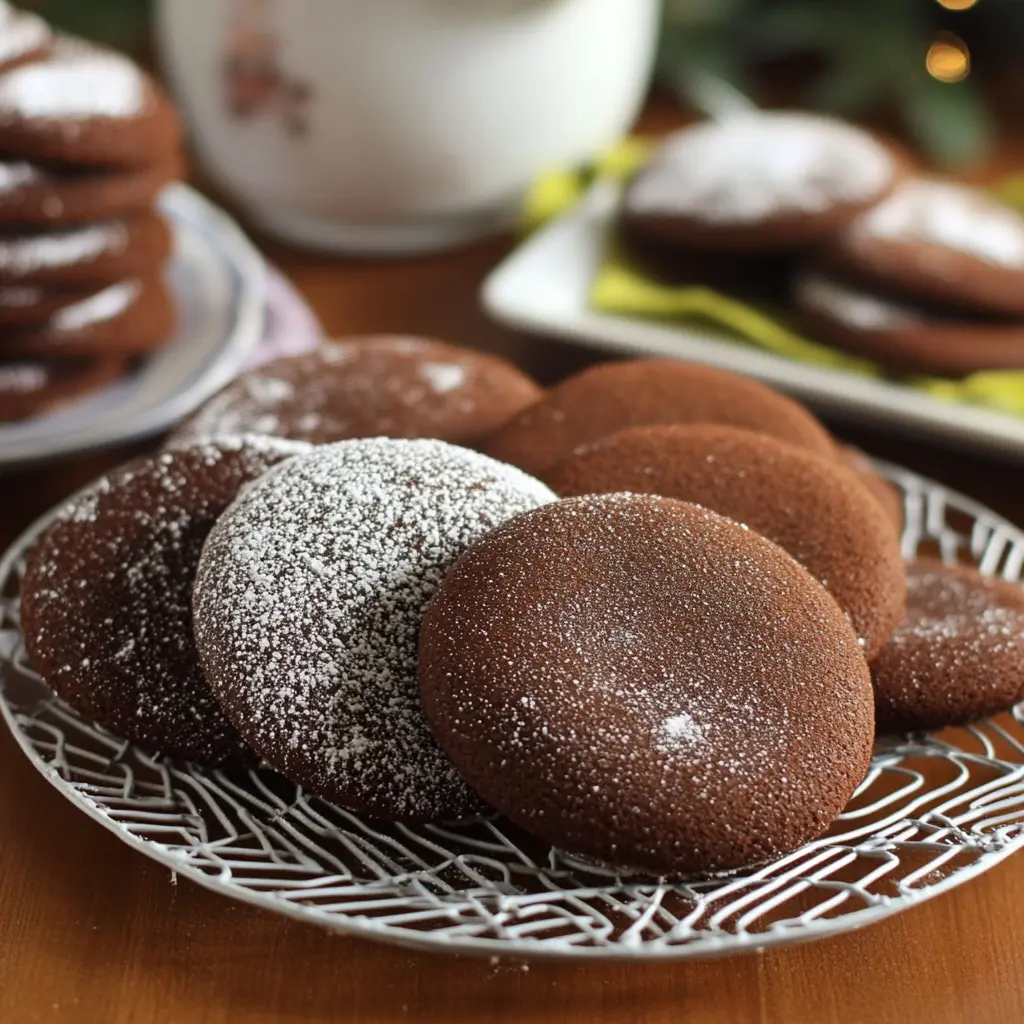
Description: These Jumbo Chocolate Cutouts are more than just cookies; they’re a warm hug in dessert form. Rich, deeply chocolatey, and subtly spiced, these large cookies are perfect for decorating, gifting, or simply enjoying with a glass of milk. Their soft, chewy texture and nostalgic flavor profile will transport you back to childhood holiday memories.
Why You Will Love This Recipe:
- Intense Chocolate Flavor: The combination of melted shortening and baking cocoa creates a deep, dark chocolate flavor that’s both satisfying and sophisticated.
- Perfectly Spiced: Cinnamon and cloves add a touch of warmth and complexity, elevating the chocolate flavor and making these cookies irresistible.
- Soft and Chewy Texture: Molasses and coffee work together to create a soft, chewy texture that lasts for days. These aren’t your typical crispy cookies!
- Fun to Decorate: The large size and smooth surface of these cutouts make them ideal for decorating with confectioners’ sugar, frosting, sprinkles, or anything your heart desires.
- Make-Ahead Friendly: The dough can be made ahead of time and refrigerated, making these cookies perfect for busy holiday baking schedules.
Introduction
As a food blogger and cookbook author, I’m always on the lookout for recipes that evoke a sense of nostalgia and comfort. These Jumbo Chocolate Cutouts do just that. They remind me of my grandmother’s kitchen, filled with the aroma of baking spices and the joy of decorating cookies with family.
This recipe is a twist on classic chocolate cutout cookies, with a few key ingredients that elevate the flavor and texture. The use of melted shortening instead of butter creates a tender crumb, while molasses adds a rich, caramel-like sweetness and helps to keep the cookies soft. Strong brewed coffee enhances the chocolate flavor and adds a subtle depth of complexity.
Whether you’re baking for a holiday party, a special occasion, or simply want to treat yourself, these Jumbo Chocolate Cutouts are sure to become a new favorite.
Ingredients:
- 1 cup shortening, melted
- 1/2 cup baking cocoa
- 1 cup molasses
- 1 cup sugar
- 2 large eggs, room temperature
- 1/2 cup strong brewed coffee, cooled slightly
- 4 cups all-purpose flour
- 2 teaspoons baking soda
- 1 teaspoon ground cinnamon
- 1/2 teaspoon salt
- 1/2 teaspoon ground cloves
- Confectioners’ sugar, for dusting or decorating
Preparation:
Step 1: In a large bowl, beat the melted shortening and baking cocoa together until well blended. This step is crucial for creating a smooth, even base for the cookie dough. Make sure the shortening is completely melted, but not hot, to avoid cooking the cocoa.
Step 2: Add the molasses, sugar, and eggs to the shortening and cocoa mixture. Beat until light and fluffy. It’s very important to use room temperature eggs for this step because it will combine much easier when blended with the rest of the ingredients. This may take 2-3 minutes. The mixture should become noticeably lighter in color and volume. This aeration helps to create a tender cookie.
Step 3: Gradually beat in the strong brewed coffee. Make sure the coffee has cooled down slightly, as hot coffee could cook the eggs. The coffee will add moisture to the dough and enhance the chocolate flavor. The liquid coffee needs to be cool so that it mixes evenly.
Step 4: In a separate bowl, whisk together the flour, baking soda, cinnamon, salt, and cloves. Whisking ensures that the dry ingredients are evenly distributed, which is essential for consistent baking. The baking soda will help the cookies rise, while the cinnamon and cloves add warmth and complexity. The salt balances the sweetness of the molasses and sugar.
Step 5: Gradually add the dry ingredients to the wet ingredients, beating on low speed until just combined. Be careful not to overmix the dough, as this can develop the gluten in the flour and result in tough cookies. The dough will be very soft and slightly sticky at this stage.
Step 6: Divide the dough in half and shape each portion into a disk. Wrap each disk in plastic wrap and refrigerate for at least 1 hour, or preferably overnight. This chilling time is crucial, as it allows the dough to firm up, making it easier to roll out and cut into shapes. It also allows the flavors to meld together.
Step 7: Preheat oven to 350°F (175°C). Line baking sheets with parchment paper or silicone baking mats.
Step 8: On a well-floured surface, roll out one portion of the chilled dough to 1/4-inch thickness. Use a floured 3 1/2-inch round cookie cutter (or any other desired shape) to cut out cookies. Re-roll the scraps and continue cutting out cookies until all the dough is used. Dust the cookie cutter in flour each time before using it so that the cookie does not stick to the cutter.
Step 9: Place the cut-out cookies 2 inches apart on the prepared baking sheets. This spacing is important to prevent the cookies from spreading and sticking together during baking.
Step 10: Bake for 14-16 minutes, or until the edges are set and the centers are slightly soft. The baking time will vary depending on your oven, so keep a close eye on the cookies. Don’t overbake them, as they will become dry.
Step 11: Let the cookies cool on the baking sheets for 2 minutes before transferring them to wire racks to cool completely. This allows the cookies to firm up and prevents them from breaking.
Step 12: Once the cookies are completely cooled, decorate as desired with confectioners’ sugar, frosting, sprinkles, or anything your heart desires. Confectioners’ sugar can be simply dusted over the cookies for a classic look, or you can create elaborate designs with frosting and sprinkles.
COOKING Rating:
Easy to Moderate
Serving Suggestions:
- Enjoy with a glass of cold milk or hot cocoa.
- Serve as part of a holiday cookie platter.
- Package them in decorative tins as gifts.
- Enjoy as an after dinner treat with a warm coffee.
- Sandwich with your favorite frosting for a chocolate cookie sandwich.
Tips:
- For a richer chocolate flavor, use dark cocoa powder.
- Add a teaspoon of vanilla extract to the dough for extra flavor.
- If the dough is too sticky to roll out, add a little more flour, one tablespoon at a time.
- To prevent the cookies from spreading, make sure the baking sheets are cold.
- Store the cooled cookies in an airtight container at room temperature for up to 5 days.
Prep Time:
20 minutes
Cook Time:
14-16 minutes
Total Time:
1 hour 34-36 minutes (includes chilling time)
Nutritional Information: (Approximate, per cookie)
Calories: 250 Protein: 2g Sodium: 100mg
Conclusion
These Jumbo Chocolate Cutouts are a timeless classic that’s perfect for any occasion. Their rich chocolate flavor, soft texture, and festive appeal make them a favorite among bakers of all skill levels. Whether you’re a seasoned baker or a beginner, this recipe is sure to impress. So gather your ingredients, preheat your oven, and get ready to create some delicious memories!
Questions and Answers:
Q1: Can I use butter instead of shortening in this recipe?
A: While you can substitute butter for shortening, it will affect the texture of the cookies. Butter will result in a slightly crisper cookie, while shortening creates a softer, more tender crumb. If you do use butter, make sure it’s unsalted and softened to room temperature. However, the texture will be different.
Q2: Can I freeze the cookie dough?
A: Absolutely! Freezing the dough is a great way to prepare in advance. Wrap the dough tightly in plastic wrap and then place it in a freezer-safe bag or container. The dough can be frozen for up to 2 months. Thaw the dough in the refrigerator overnight before rolling out and baking.
Q3: What if I don’t have molasses?
A: Molasses is essential for the unique flavor and texture of these cookies. If you don’t have any on hand, you can try substituting dark corn syrup, but the flavor will be slightly different. You could use 1/2 cup of maple syrup to substitute.
Q4: Can I add chocolate chips to the dough?
A: Yes, you can definitely add chocolate chips to the dough! Fold in about 1 cup of your favorite chocolate chips (milk chocolate, semi-sweet, or dark chocolate) after adding the dry ingredients. This will add an extra layer of chocolatey goodness to the cookies.
Q5: How can I prevent the cookies from spreading too much during baking?
A: To prevent the cookies from spreading, make sure the oven temperature is accurate, and that the baking sheets are cold. You can also chill the cut-out cookies on the baking sheets in the refrigerator for 15-20 minutes before baking. Avoid overmixing the dough, and make sure the butter is not too soft.