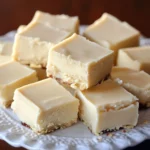
Description: These delightful Kolaches are soft, slightly sweet yeast dough pastries filled with your choice of fruit or sweet fillings. A classic treat from Central European cuisine, these pastries are perfect for breakfast, brunch, or a delightful afternoon snack.
Why you will love this recipe: These kolaches are a delightful project for any baker looking to explore traditional European baking. The soft, pillowy dough, combined with a sweet and tangy filling, creates a flavor explosion in every bite. This recipe is also incredibly versatile – you can customize the fillings to your liking, making each batch unique and delicious. Whether you’re sharing them with friends and family or enjoying them yourself with a cup of coffee, these kolaches are sure to bring a smile to your face. The process of making them, while requiring some time and patience, is ultimately rewarding, resulting in a truly homemade treat that tastes far better than anything you could buy in a store. Plus, the aroma that fills your kitchen as they bake is simply divine!
Introduction
Kolaches are more than just pastries; they’re a taste of history and tradition. Originating from Central Europe, particularly the Czech Republic, these filled buns have become a beloved treat enjoyed around the world. The word “kolach” comes from the Czech word “kola,” meaning “wheel” or “circle,” referring to the traditional round shape of the pastry.
These little morsels of deliciousness are a staple at celebrations, holidays, and family gatherings, carrying with them a sense of nostalgia and warmth. The soft, slightly sweet dough, combined with a variety of fillings like prune, poppy seed, cherry, or even cream cheese, makes for a delightful combination of textures and flavors. This recipe aims to bring the authentic taste of kolaches to your kitchen, allowing you to create a memorable experience for yourself and those you share them with. While it may seem daunting at first, the process is broken down into easy-to-follow steps, making it achievable for bakers of all skill levels. Get ready to embark on a culinary journey that will transport you to the heart of Central Europe, one delicious kolach at a time. Don’t be intimidated by the yeast, it’s a beautiful, transformative ingredient that brings these kolaches to life! Just follow the steps carefully and trust the process. The reward is well worth the effort.
Ingredients:
- 2 packages (1/4 ounce each) active dry yeast
- 1/2 cup granulated sugar, divided
- 2 cups warm 2% milk (110° to 115°F)
- 5-3/4 to 6-1/2 cups all-purpose flour, plus more for dusting
- 4 large egg yolks, room temperature
- 1 teaspoon salt
- 1/4 cup unsalted butter, softened
- 2 cups canned prune, poppy seed, cherry, or lemon pie filling (or a combination)
- 1 large egg white, beaten
Preparation:
Step 1: Activate the Yeast
In a small bowl, combine the active dry yeast with 1 tablespoon of the granulated sugar. Pour the warm milk (110° to 115°F) over the yeast and sugar mixture. Gently stir to combine. Let the mixture stand for about 10 minutes, or until the yeast is foamy and bubbly. This indicates that the yeast is alive and active, ready to leaven the dough. If the yeast doesn’t foam, it may be expired, and you’ll need to start with fresh yeast. Ensure the milk is not too hot, as it can kill the yeast. The temperature is crucial for activating the yeast properly. You can use a thermometer to ensure accuracy.
Step 2: Combine Wet and Dry Ingredients
In a large bowl (or the bowl of a stand mixer fitted with a dough hook), combine 2 cups of the all-purpose flour, the remaining granulated sugar, the egg yolks, salt, and softened butter. Add the yeast/milk mixture to the bowl. Mix the ingredients together until a smooth batter forms. If you’re using a stand mixer, mix on low speed to start, gradually increasing the speed as the ingredients combine. The egg yolks should be at room temperature to ensure they incorporate evenly into the dough.
Step 3: Knead the Dough
Gradually add the remaining flour, about 1/2 cup at a time, mixing well after each addition, until the dough starts to come together and pulls away from the sides of the bowl. Turn the dough out onto a lightly floured surface. Knead the dough for 6-8 minutes, adding additional flour as needed to prevent it from sticking. The dough should be smooth, elastic, and slightly tacky. If you’re using a stand mixer, knead the dough with the dough hook attachment for about 6-8 minutes on medium speed. The kneading process develops the gluten in the flour, which gives the kolaches their soft and chewy texture.
Step 4: First Rise
Place the kneaded dough in a greased bowl, turning once to coat the top. This prevents the dough from drying out. Cover the bowl with a clean kitchen towel or plastic wrap. Place the bowl in a warm, draft-free place and let the dough rise until it has doubled in bulk, about 1 hour. The warmer the environment, the faster the dough will rise. You can place the bowl in a slightly warm oven (turned off) or near a sunny window. This first rise is crucial for developing the flavor and texture of the kolaches.
Step 5: Second Rise and Shaping
Punch the dough down to release the air. This helps to even out the texture of the dough. Allow the dough to rise again for another 30 minutes. This second rise will further develop the flavor and give the kolaches a lighter texture. Roll the dough out on a lightly floured surface to a 1/2-inch thickness. Use a large glass or a 2-1/2-inch cookie cutter to cut out circles of dough. Place the dough circles on greased baking sheets, leaving some space between each circle.
Step 6: Final Rise and Filling
Let the dough circles rise until doubled, about 45 minutes. This final rise is important for creating a light and airy kolach. Gently press an indentation into the center of each circle using your fingers or the back of a spoon. Fill each indentation with 1 heaping tablespoon of your chosen filling. Be careful not to overfill the kolaches, as the filling may spill out during baking.
Step 7: Baking
Brush the exposed dough with the beaten egg white. This will give the kolaches a beautiful golden-brown color and a slightly glossy finish. Bake in a preheated oven at 350°F (175°C) for 10-15 minutes, or until the kolaches are light golden brown. Keep a close eye on them as they bake to prevent them from burning.
Step 8: Cooling
Remove the kolaches from the oven and let them cool on the baking sheets for a few minutes before transferring them to a wire rack to cool completely. This prevents them from sticking to the baking sheets.
COOKING Rating:
- Difficulty: Medium
- Taste: Sweet and satisfying
- Time Commitment: Medium (requires some rising time)
Serving Suggestions:
- Enjoy warm or at room temperature.
- Serve with a cup of coffee or tea.
- Dust with powdered sugar for an extra touch of sweetness.
- Perfect for breakfast, brunch, or a dessert.
- Serve as a part of Holiday celebrations.
Tips:
- Make sure your yeast is fresh and active.
- Don’t overheat the milk, as it can kill the yeast.
- Knead the dough well for a soft and elastic texture.
- Allow the dough to rise properly in a warm place.
- Experiment with different fillings to find your favorite combination.
- For a richer flavor, use whole milk instead of 2%.
- If you don’t have a cookie cutter, you can use a knife to cut the dough into squares or diamonds.
- Leftover kolaches can be stored in an airtight container at room temperature for up to 3 days.
Prep Time:
- 30 minutes
Cook Time:
- 10-15 minutes
Total Time:
- Approximately 3 hours (including rising time)
Nutritional Information (per kolach, approximate):
- Calories: 250-300 (depending on filling)
- Protein: 5-7g
- Sodium: 100-150mg
Conclusion
These Kolaches are a testament to the beauty of traditional baking. With their soft dough, sweet fillings, and golden-brown crust, they are a treat that is sure to impress. While the process may take some time, the end result is well worth the effort. So gather your ingredients, roll up your sleeves, and get ready to experience the joy of making your very own homemade Kolaches.
Questions and Answers:
Q1: Can I use a different type of filling? A: Absolutely! One of the best things about kolaches is their versatility. While the recipe suggests prune, poppy seed, cherry, or lemon pie filling, you can use almost any sweet filling you like. Try using apricot jam, blueberry preserves, cream cheese filling (sweetened with sugar and vanilla), or even a nutella swirl. If you’re feeling adventurous, you could even try savory fillings like a cheese and herb mixture or a mushroom duxelles. Just make sure the filling isn’t too runny, as it could leak out during baking.
Q2: Can I make the dough ahead of time? A: Yes, you can definitely make the dough ahead of time. After the first rise, punch down the dough, wrap it tightly in plastic wrap, and refrigerate it for up to 24 hours. When you’re ready to bake, remove the dough from the refrigerator and let it come to room temperature for about 30 minutes before rolling it out and proceeding with the recipe. This can be a great time-saver if you’re short on time or want to break up the process into smaller steps. However, you may want to let the dough have a shorter second rise.
Q3: How do I ensure the kolaches are soft and not dry? A: Several factors contribute to soft and moist kolaches. First, make sure you don’t overbake them. Bake until they are light golden brown, but still soft to the touch. Overbaking will dry them out. Second, ensure that the dough is properly kneaded and has risen sufficiently. This develops the gluten and creates a soft, airy texture. Also, brushing the dough with egg white before baking helps to create a protective layer that prevents moisture loss.
Q4: Can I freeze the Kolaches? A: Yes, kolaches freeze well! Allow the baked kolaches to cool completely. Then, wrap them individually in plastic wrap or foil, or place them in a freezer-safe container. They can be stored in the freezer for up to 2-3 months. To thaw, remove them from the freezer and let them thaw at room temperature for several hours. You can also warm them slightly in the oven or microwave before serving.
Q5: What if my dough isn’t rising properly? A: There are a few reasons why your dough might not be rising properly. The most common reason is that the yeast is old or inactive. Make sure to check the expiration date of your yeast and store it in a cool, dry place. Another reason could be that the milk wasn’t warm enough (or was too hot). The ideal temperature is between 110°F and 115°F. Also, the environment where you’re letting the dough rise might be too cold or drafty. Find a warm, draft-free spot, such as a slightly warm oven (turned off) or a sunny window. Finally, ensure the dough is properly hydrated and kneaded.