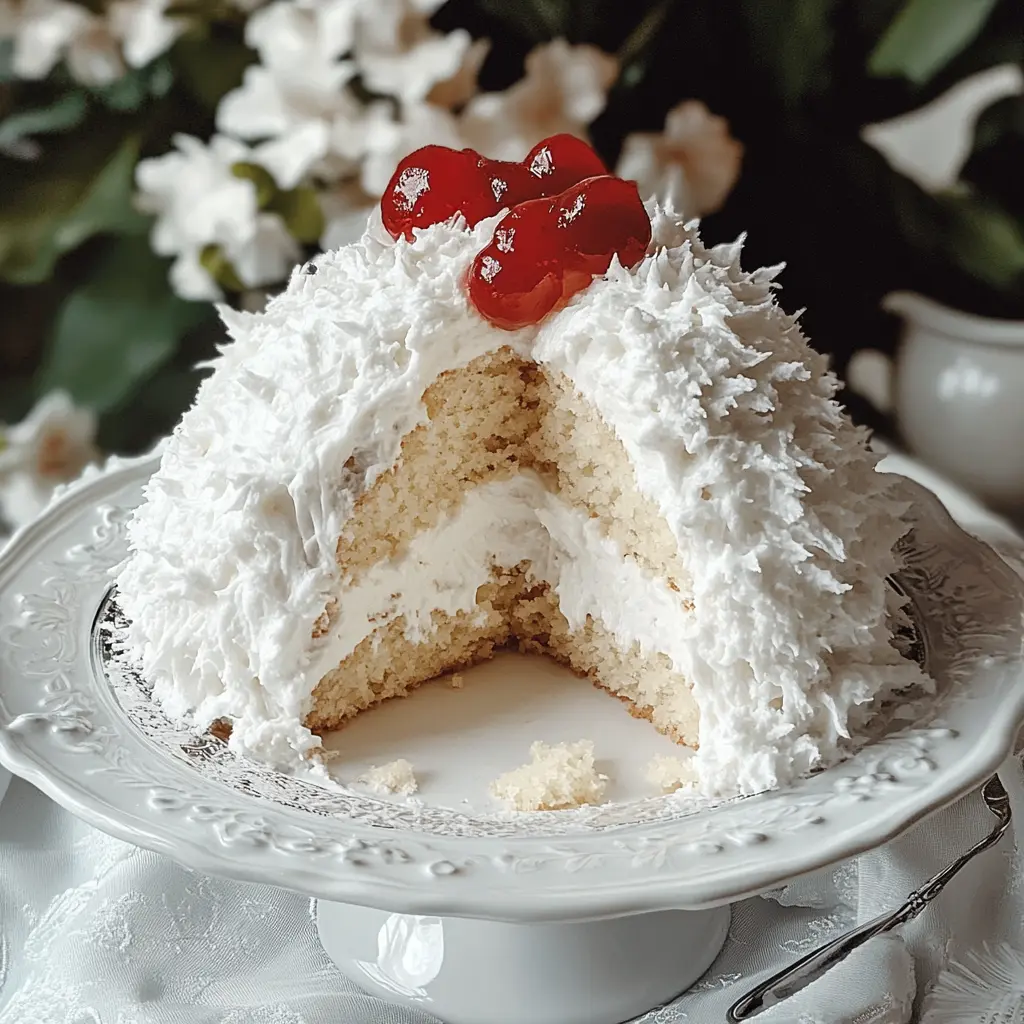
Description of this recipe: This Old-Fashioned Snowball Cake is a delightful classic, a snowy dream brought to life in cake form. It features moist, tender cake layers enveloped in a cloud of sweet whipped cream and coated generously with sweetened shredded coconut. It’s a beautiful and delicious dessert that’s perfect for holidays, celebrations, or any occasion when you want to impress.
Why you will love this recipe: You will absolutely fall in love with this Snowball Cake because it’s more than just a dessert; it’s an experience. The soft, buttery cake layers melt in your mouth, perfectly complemented by the airy, delicate whipped cream frosting. The blanket of sweet coconut adds a delightful texture and a hint of tropical flavor, creating a symphony of tastes and sensations. This cake is surprisingly easy to make, and the visual appeal is undeniable. It’s a guaranteed crowd-pleaser that will leave everyone wanting more. Plus, it’s a wonderful way to evoke nostalgic memories of classic, homemade desserts. The snowball cake is also extremely versatile. You can adapt the cake flavors and add variations to the whipped cream frosting to create new flavor combinations. Finally, it is an extremely beautiful cake that can serve as a centerpiece at any holiday or family gathering!
Introduction
The Old-Fashioned Snowball Cake is a nostalgic dessert that harkens back to a time when homemade treats were the centerpiece of family gatherings. Its simple elegance and comforting flavors make it a timeless classic that continues to delight generations. This recipe, meticulously crafted and tested, ensures a moist, tender cake, a light and airy whipped cream frosting, and a generous coating of sweetened coconut that perfectly captures the essence of a snowy wonderland.
The beauty of this cake lies in its simplicity and the quality of its ingredients. There are no complicated techniques or fancy equipment required. The recipe is straightforward and easy to follow, making it accessible to bakers of all skill levels. From mixing the batter to whipping the cream and decorating with coconut, each step is designed to ensure success and a truly memorable dessert. Whether you’re baking for a holiday celebration, a birthday party, or simply a special family dinner, the Old-Fashioned Snowball Cake is sure to be a showstopper.
Moreover, the Snowball Cake is incredibly adaptable. You can experiment with different flavor extracts in the cake batter, such as lemon or orange, to create a unique twist. For the frosting, consider adding a touch of liqueur or flavoring the whipped cream with cocoa powder for a chocolate variation. The possibilities are endless, allowing you to customize the cake to your personal preferences. The classic version provided here offers a perfect starting point, which you can then enhance with your own creative flair.
So, gather your ingredients, preheat your oven, and prepare to embark on a delightful baking journey. The Old-Fashioned Snowball Cake is more than just a dessert; it’s a tradition, a memory, and a celebration of homemade goodness. Enjoy the process and savor the delicious results!
Ingredients:
For the Cake:
- 2 ½ cups all-purpose flour
- 2 ½ teaspoons baking powder
- ½ teaspoon salt
- 1 cup unsalted butter, softened
- 2 cups granulated sugar
- 4 large eggs, room temperature
- 1 teaspoon vanilla extract
- 1 teaspoon almond extract
- 1 cup whole milk
For the Frosting and Assembly:
- 3 cups heavy whipping cream
- ⅓ cup powdered sugar
- 1 teaspoon vanilla extract
- 2 ½ cups sweetened shredded coconut
Preparation:
Step 1: Prepare the Pans and Preheat the Oven
Begin by preheating your oven to 350°F (175°C). Proper oven temperature is crucial for even baking. Grease two 9-inch round cake pans generously with butter or cooking spray. Dust the inside of each pan with flour, tapping out any excess to prevent the cake from sticking. This step ensures that the cakes release cleanly after baking. For added insurance, line the bottoms of the pans with circles of parchment paper, which will make removing the cakes even easier.
Step 2: Combine the Dry Ingredients
In a medium bowl, whisk together the all-purpose flour, baking powder, and salt. Whisking ensures that the ingredients are evenly distributed, resulting in a more uniform texture in the final cake. The baking powder provides leavening, helping the cake rise, while the salt enhances the flavors of the other ingredients. Set this mixture aside.
Step 3: Cream the Butter and Sugar
In a large bowl, using an electric mixer (stand mixer or hand mixer), beat the softened unsalted butter and granulated sugar together until the mixture is light and fluffy. This process, known as creaming, incorporates air into the batter, which is essential for creating a tender cake. Beat on medium speed for 3-4 minutes, scraping down the sides of the bowl as needed to ensure that all the butter and sugar are fully combined. The mixture should become visibly lighter in color and significantly fluffier.
Step 4: Add the Eggs and Extracts
Add the large eggs one at a time to the creamed butter and sugar mixture, beating well after each addition. Make sure each egg is fully incorporated before adding the next. Room-temperature eggs emulsify more easily and create a smoother batter. After all the eggs have been added, mix in the vanilla extract and almond extract. These extracts enhance the flavor of the cake, adding depth and complexity. Feel free to experiment with other extracts, such as lemon or orange, to create a different flavor profile.
Step 5: Alternate Dry and Wet Ingredients
Gradually add the dry ingredients (flour mixture) and whole milk to the batter, alternating between the two. Begin and end with the dry ingredients to prevent gluten development, which can result in a tough cake. Add about one-third of the dry ingredients to the batter and mix until just combined. Then, add half of the milk and mix until just combined. Repeat with another third of the dry ingredients, followed by the remaining milk, and finish with the last third of the dry ingredients. Mix until the batter is just combined; avoid overmixing, as this can also lead to a tough cake.
Step 6: Divide and Bake the Batter
Divide the batter evenly between the prepared cake pans. Use a spatula to smooth the tops of the batter in each pan, ensuring an even distribution. Bake in the preheated oven for 25-30 minutes, or until a toothpick inserted into the center of the cake comes out clean. The cakes should be golden brown on top and spring back lightly when touched.
Step 7: Cool the Cakes
Once the cakes are baked, remove them from the oven and let them cool in the pans for 10 minutes. This allows the cakes to set slightly before being transferred to a wire rack. After 10 minutes, carefully invert the cakes onto a wire rack to cool completely. Ensure the cakes are completely cool before frosting, as warm cakes can cause the whipped cream to melt.
Step 8: Make the Whipped Cream Frosting
While the cakes are cooling, prepare the whipped cream frosting. In a large bowl, combine the heavy whipping cream, powdered sugar, and vanilla extract. Using an electric mixer, beat the mixture until stiff peaks form. Be careful not to overwhip, as this can turn the cream into butter. The whipped cream should be light, airy, and able to hold its shape when the beaters are lifted.
Step 9: Assemble the Cake
Once the cakes are completely cool, place one cake layer on a serving plate or cake stand. Spread a generous layer of whipped cream frosting evenly over the top of the cake layer. Carefully place the second cake layer on top of the frosted layer. Frost the top and sides of the entire cake with the remaining whipped cream.
Step 10: Coat with Coconut
Generously press the sweetened shredded coconut onto the frosting, covering the entire cake. Make sure to cover the top and sides completely, creating a beautiful “snowball” effect. Gently pat the coconut onto the frosting to ensure it adheres well.
Step 11: Chill and Serve
Chill the assembled cake in the refrigerator for at least 1 hour before serving. This allows the frosting to set and the flavors to meld together. Chilling also makes the cake easier to slice and serve. Slice and enjoy the Old-Fashioned Snowball Cake!
COOKING Rating:
- Ease: Medium – requires careful measuring and some attention to detail.
- Taste: Excellent – a delightful blend of flavors and textures.
- Presentation: High – visually stunning and elegant.
Serving Suggestions:
- Serve the cake chilled for the best flavor and texture.
- Garnish with fresh berries or a dusting of powdered sugar for an extra touch of elegance.
- Serve with a scoop of vanilla ice cream or a dollop of whipped cream for an even more decadent treat.
- Pair with a cup of hot coffee, tea, or a glass of cold milk.
Tips:
- Use room-temperature eggs and softened butter for a smoother batter.
- Measure ingredients accurately, especially the baking powder, for the best results.
- Avoid overmixing the batter to prevent a tough cake.
- Make sure the cakes are completely cool before frosting to prevent the whipped cream from melting.
- If you don’t have parchment paper, you can grease and flour the pans very thoroughly.
- For a more intense coconut flavor, toast the shredded coconut lightly before using it to decorate the cake.
- If you’re short on time, you can use store-bought whipped cream, but homemade whipped cream is highly recommended for its superior flavor and texture.
- To prevent the cake from drying out, store it in an airtight container in the refrigerator.
Prep Time: 30 minutes Cook Time: 25-30 minutes Total Time: 1 hour (plus chilling time)
Nutritional Information: (per serving, approximately) (Note: Nutritional information is an estimate and can vary based on specific ingredients and serving sizes.)
- Calories: 450
- Protein: 5g
- Sodium: 200mg
Conclusion
The Old-Fashioned Snowball Cake is a true classic that deserves a place in every baker’s repertoire. Its moist, tender cake layers, light and airy whipped cream frosting, and generous coating of sweet coconut create a dessert that is both visually stunning and incredibly delicious. Whether you’re baking for a special occasion or simply want to treat yourself and your loved ones to something special, this cake is sure to impress. The simple yet elegant flavors and the nostalgic appeal of this dessert make it a perfect choice for any gathering. So, gather your ingredients, follow the steps, and enjoy the delightful experience of creating this timeless masterpiece. The Old-Fashioned Snowball Cake is not just a dessert; it’s a tradition, a memory, and a celebration of homemade goodness that will be cherished for years to come.
Questions and Answers about the Old-Fashioned Snowball Cake Recipe:
Q1: Can I make this cake ahead of time?
A1: Absolutely! The Old-Fashioned Snowball Cake can be made a day or two in advance. In fact, chilling the cake overnight allows the flavors to meld together, resulting in an even more delicious dessert. However, it’s best to frost the cake with the whipped cream and coconut just before serving, or at most, a few hours in advance, as the whipped cream can sometimes soften or weep slightly after a prolonged period. To prevent the cake from drying out, store it in an airtight container in the refrigerator. If you’re making it further in advance, you can bake the cake layers, wrap them tightly in plastic wrap, and freeze them for up to a month. Thaw them completely before frosting and assembling the cake.
Q2: What can I use if I don’t have almond extract?
A2: If you don’t have almond extract, you can substitute it with another extract or simply omit it. Vanilla extract is a great alternative, as it complements the other flavors in the cake. You can use 2 teaspoons of vanilla extract instead of 1 teaspoon of vanilla and 1 teaspoon of almond. Another option is to use a small amount of lemon or orange zest, which will add a bright, citrusy note to the cake. If you choose to omit the almond extract altogether, the cake will still be delicious, although it will have a slightly different flavor profile. The almond extract adds a subtle nutty aroma and flavor that enhances the overall taste of the cake.
Q3: Can I use store-bought whipped cream frosting instead of making my own?
A3: While it’s possible to use store-bought whipped cream frosting for convenience, homemade whipped cream frosting is highly recommended for its superior flavor and texture. Store-bought whipped cream often contains stabilizers and artificial flavors that can detract from the overall taste of the cake. Homemade whipped cream is light, airy, and has a fresh, clean flavor that perfectly complements the cake layers and coconut. If you’re short on time, you can use store-bought, but be sure to choose a high-quality brand. To enhance the flavor of store-bought whipped cream, you can add a teaspoon of vanilla extract and a tablespoon of powdered sugar, then gently fold it in.
Q4: Can I toast the coconut before using it to decorate the cake?
A4: Yes, toasting the coconut before using it to decorate the cake can add a wonderful depth of flavor and a slightly crunchy texture. To toast the coconut, spread it in a single layer on a baking sheet and bake in a preheated oven at 350°F (175°C) for 5-10 minutes, or until it is lightly golden brown. Watch it carefully, as it can burn quickly. Alternatively, you can toast the coconut in a dry skillet over medium heat, stirring constantly until it is lightly golden brown. Allow the toasted coconut to cool completely before using it to decorate the cake. The toasted coconut will add a nutty, caramelized flavor that enhances the overall taste and texture of the Snowball Cake.
Q5: What is the best way to slice the cake to keep it from falling apart?
A5: To slice the Old-Fashioned Snowball Cake neatly and prevent it from falling apart, use a serrated knife and a gentle sawing motion. Avoid pressing down too hard, as this can crush the cake and cause the frosting and coconut to smear. Before each slice, wipe the knife clean with a damp cloth to remove any crumbs or frosting. For best results, chill the cake thoroughly before slicing, as this will help the layers hold together. If you’re serving individual slices, you can use a spatula to carefully lift each slice from the cake stand. Another helpful tip is to use a warm knife, which will glide through the cake more easily. To warm the knife, simply dip it in hot water, wipe it dry, and then slice the cake. Repeat as needed to ensure clean, even slices.