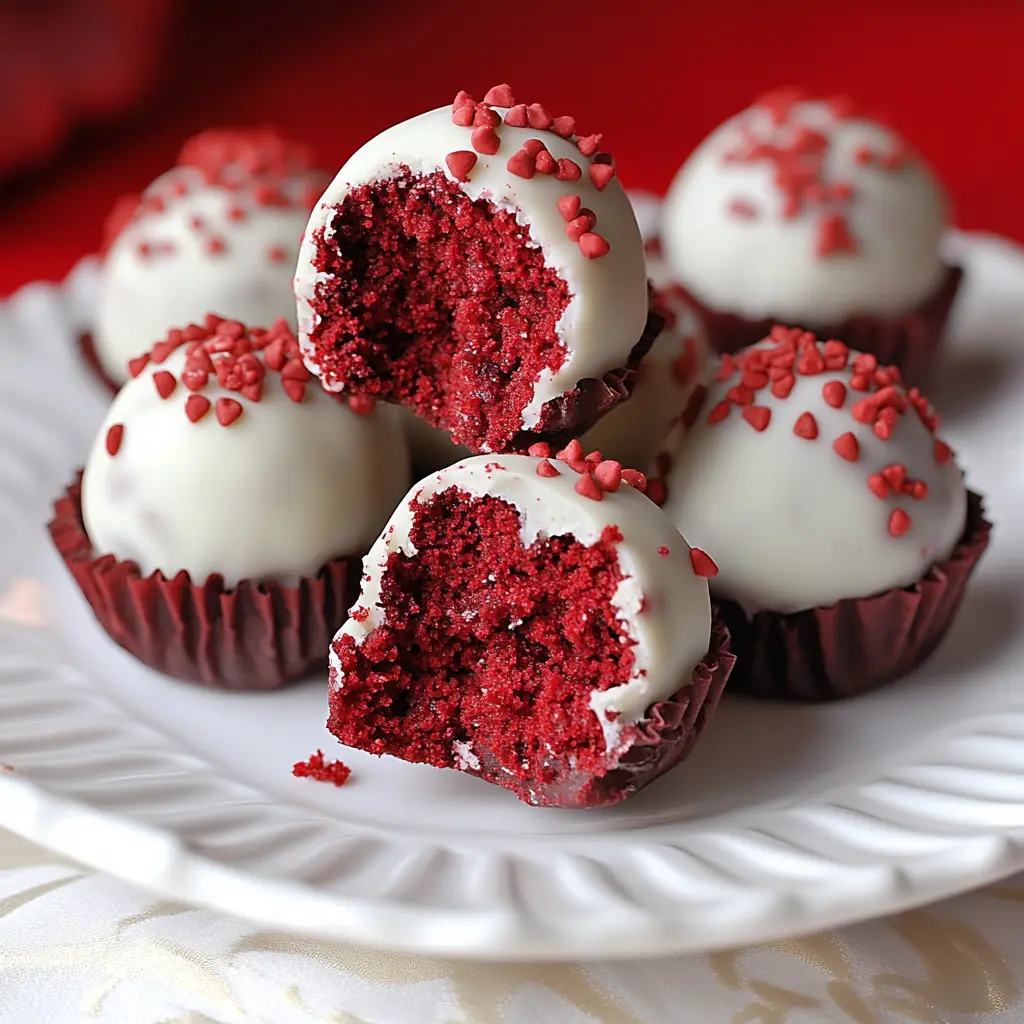
Description of this recipe: Indulge in the irresistible allure of Red Velvet Cake Balls! These bite-sized treats are a delightful twist on the classic red velvet cake, combining the rich, velvety flavor with a creamy, melt-in-your-mouth texture, all enrobed in a luscious chocolate coating. Perfect for parties, holidays, or simply a sweet afternoon indulgence, these cake balls are surprisingly easy to make and guaranteed to be a crowd-pleaser.
Why you will love this recipe:
- Effortless Elegance: Impress your friends and family with these visually stunning treats that require minimal effort. They’re a sophisticated dessert option without the fuss of baking a whole cake.
- Perfect for Sharing: These cake balls are perfectly portioned for sharing, making them ideal for potlucks, holiday gatherings, or gift-giving.
- Customizable: Get creative with your coatings and decorations! Use different types of chocolate, sprinkles, nuts, or even edible glitter to personalize your cake balls.
- No-Bake Option: If you’re short on time, you can use a store-bought red velvet cake to speed up the process.
- Deliciously Addictive: The combination of moist red velvet cake, creamy frosting, and rich chocolate coating is simply irresistible. Be prepared for these cake balls to disappear quickly!
Introduction
Red velvet cake is an iconic dessert with its striking color, subtle cocoa flavor, and tangy undertones. But sometimes, you crave that familiar flavor in a more convenient and playful form. Enter Red Velvet Cake Balls! These delectable treats transform the traditional cake into a bite-sized sensation, perfect for any occasion.
This recipe takes the essential elements of red velvet cake – the moist crumb, the creamy frosting, and the decadent chocolate – and reinterprets them into an easy-to-make, portable dessert. Imagine the joy of popping a perfectly round, chocolate-coated sphere into your mouth, savoring the velvety texture and the harmonious blend of flavors. It’s a moment of pure bliss!
Whether you’re a seasoned baker or a kitchen novice, this recipe is designed for success. It uses simple ingredients and straightforward steps, making it a fun and rewarding baking project. So, gather your ingredients, put on your favorite music, and let’s create some red velvet magic!
Ingredients:
- 1 box red velvet cake mix (or equivalent of homemade red velvet cake, about 6-8 cups crumbled)
- 1 can (16 oz) cream cheese frosting (full-fat cream cheese frosting yields the best results)
- 12 oz – 16 oz chocolate or candy melts (dark chocolate, milk chocolate, white chocolate, or a combination)
- Optional decorations: Sprinkles, chopped nuts, edible glitter, melted white chocolate for drizzling.
Preparation:
Step 1: Prepare the Cake
Begin by baking the red velvet cake according to the package instructions on the cake mix box. Follow the directions precisely, paying close attention to baking time and temperature. Alternatively, if you prefer to make your red velvet cake from scratch, use your favorite recipe and ensure it’s a moist and flavorful cake. Once baked, let the cake cool completely. This step is crucial because warm cake will be difficult to crumble and will make the cake ball mixture too soft. Allow at least 2-3 hours for complete cooling.
Step 2: Crumble the Cake
Once the cake is completely cool, it’s time to crumble it. Remove the cake from the pan and place it in a large mixing bowl. Using your hands or a fork, break the cake into small, even crumbs. Ensure there are no large lumps remaining. The consistency should be similar to coarse sand.
Step 3: Combine with Frosting
Add the entire can (16 oz) of cream cheese frosting to the bowl of crumbled cake. Use a spatula or your hands to thoroughly combine the cake crumbs and frosting. Gently mix until the mixture is evenly distributed and the cake is moistened by the frosting. Avoid overmixing, which can result in a tough texture. The mixture should be moist enough to hold its shape when pressed together but not overly sticky or wet.
Step 4: Form the Balls
Using a tablespoon or a small cookie scoop, scoop out portions of the cake mixture. Roll each portion between your palms to form a smooth, round ball. Aim for consistent size to ensure even coating and a uniform appearance. Place the formed cake balls on a baking sheet lined with wax paper or parchment paper.
Step 5: Chill the Cake Balls
Once all the cake balls are formed, place the baking sheet in the refrigerator for at least 1 hour, or preferably 2 hours. Chilling is essential for firming up the cake balls, making them easier to dip in chocolate without falling apart. The colder the cake balls, the better they will hold their shape during the dipping process.
Step 6: Melt the Chocolate
While the cake balls are chilling, prepare the chocolate coating. In a heat-safe bowl, melt the chocolate or candy melts using one of the following methods:
- Microwave: Microwave in 30-second intervals, stirring in between, until completely melted and smooth. Be careful not to overheat the chocolate, which can cause it to seize.
- Double Boiler: Place the chocolate in a heat-safe bowl set over a pot of simmering water. Stir frequently until melted and smooth.
If the melted chocolate is too thick, you can add a teaspoon of vegetable oil or shortening to thin it out.
Step 7: Dip and Set
Remove the chilled cake balls from the refrigerator. One at a time, dip each cake ball into the melted chocolate, ensuring it is fully coated. You can use a fork, dipping tool, or your fingers to carefully maneuver the cake ball in the chocolate. Gently tap off any excess chocolate. Place the coated cake ball back on the wax paper or parchment paper.
Step 8: Decorate (Optional)
While the chocolate coating is still wet, sprinkle with your desired decorations, such as sprinkles, chopped nuts, or edible glitter. Alternatively, you can drizzle melted white chocolate over the cake balls for an elegant touch.
Step 9: Let the Coating Harden
Allow the chocolate coating to harden completely at room temperature or in the refrigerator. This will typically take about 30-60 minutes at room temperature or 15-30 minutes in the refrigerator.
Step 10: Enjoy!
Once the chocolate coating has hardened, your Red Velvet Cake Balls are ready to serve and enjoy! Store them in an airtight container in the refrigerator for up to a week.
COOKING Rating:
- Ease of Preparation: Easy
- Taste: Delicious
- Visual Appeal: Excellent
- Kid-Friendly: Yes
Serving Suggestions:
- Serve as a dessert at parties, holidays, or gatherings.
- Pack them in gift boxes for a sweet and thoughtful present.
- Enjoy them as a sweet treat with a cup of coffee or tea.
- Serve them alongside a scoop of vanilla ice cream.
- Create a dessert platter with a variety of cake balls and other sweet treats.
Tips:
- Use high-quality chocolate or candy melts for the best flavor and appearance.
- If the cake ball mixture is too soft, add more crumbled cake to firm it up.
- If the chocolate coating is too thick, add a teaspoon of vegetable oil or shortening to thin it out.
- Use different types of chocolate for a variety of flavors and colors.
- Get creative with your decorations to personalize your cake balls.
- Store the cake balls in an airtight container in the refrigerator to maintain their freshness.
- Use a double boiler for melting chocolate.
Prep Time: 20 minutes
Cook Time: 30 minutes
Total Time: 2 hours 50 minutes (includes chilling time)
Nutritional Information (per cake ball, estimated):
- Calories: 150-200
- Protein: 2g
- Sodium: 50mg
Conclusion
Red Velvet Cake Balls are a delightful and easy-to-make treat that is sure to impress. With their rich flavor, creamy texture, and beautiful presentation, they are perfect for any occasion. So go ahead, indulge in these bite-sized morsels of red velvet heaven!
Q&A:
Q1: Can I use a different type of cake mix instead of red velvet?
A: Absolutely! While red velvet provides the signature flavor and color, you can certainly experiment with other cake mixes like chocolate, vanilla, or even spice cake. Just keep in mind that the final product will have a different taste profile, but it can still be delicious. Consider adjusting the type of frosting to complement the cake flavor – for example, chocolate cake balls would pair well with chocolate frosting.
Q2: What can I do if my cake ball mixture is too crumbly and won’t hold its shape?
A: If your cake ball mixture is too dry and crumbly, it simply needs more moisture. Try adding a tablespoon or two more of cream cheese frosting at a time, mixing well after each addition, until the mixture is moist enough to hold its shape when pressed together. You can also add a tablespoon of milk or cream, but be careful not to add too much, as the mixture can become too wet.
Q3: How do I prevent the chocolate coating from cracking when I dip the cake balls?
A: Chocolate cracking is often caused by a temperature difference between the cake balls and the melted chocolate. Make sure the cake balls are thoroughly chilled before dipping, and avoid drastic temperature changes. Also, ensure that the melted chocolate is not too hot; overheating can cause it to become brittle and crack easily. Adding a small amount of vegetable oil or shortening to the melted chocolate can also help to improve its elasticity and prevent cracking.
Q4: What is the best way to store Red Velvet Cake Balls to keep them fresh?
A: The best way to store Red Velvet Cake Balls is in an airtight container in the refrigerator. This will help to prevent them from drying out and maintain their flavor and texture. They can typically be stored for up to a week in the refrigerator. If you want to store them for a longer period, you can freeze them for up to a month. Thaw them in the refrigerator before serving.
Q5: Can I make these cake balls ahead of time for a party?
A: Yes, absolutely! Red Velvet Cake Balls are a great make-ahead dessert. You can prepare them up to 2-3 days in advance and store them in an airtight container in the refrigerator until you’re ready to serve them. Just be sure to keep them refrigerated to maintain their freshness and prevent the chocolate coating from melting. This makes them a perfect choice for parties or events where you need to prepare food in advance.