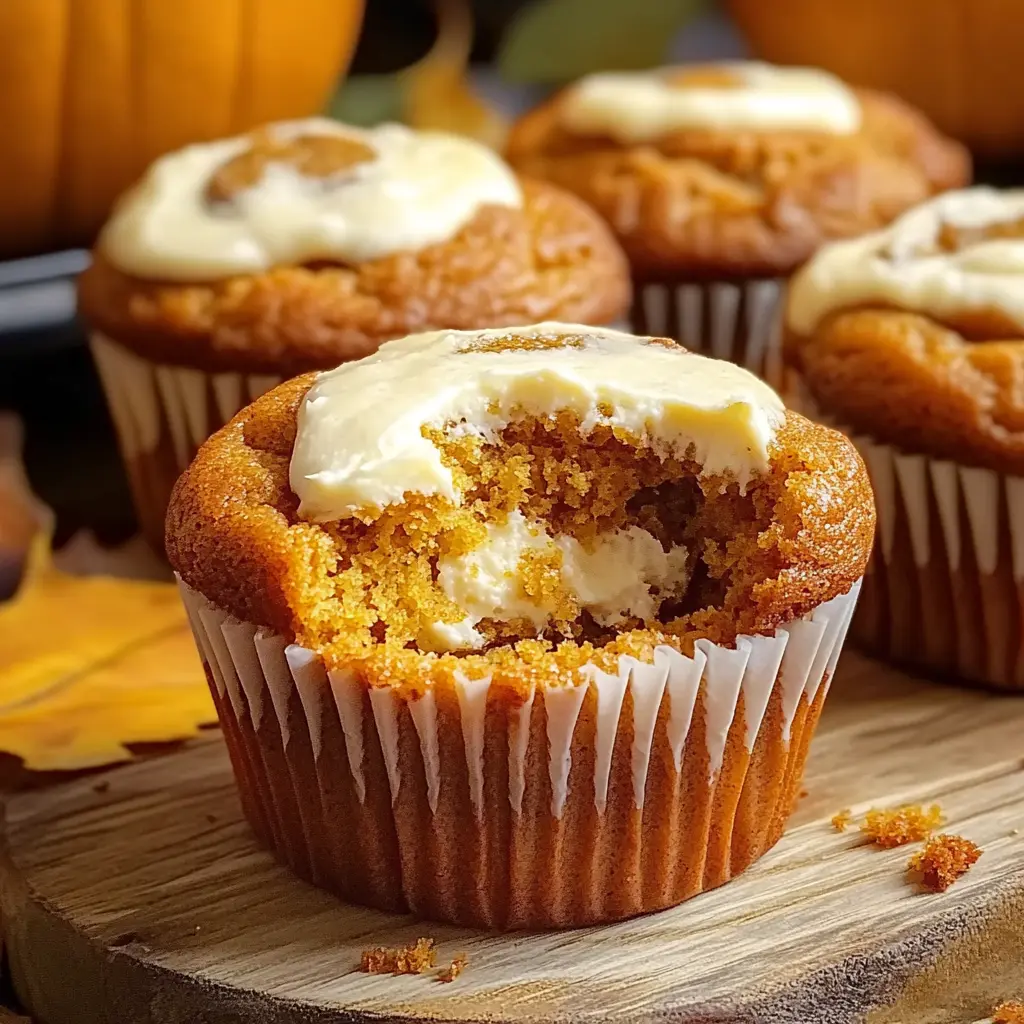
Description: Indulge in the cozy flavors of fall with these delectable homemade Starbucks Pumpkin Cream Cheese Muffins. These moist and tender muffins are infused with warm spices, filled with a luscious cream cheese center, and topped with crunchy pumpkin seeds. They’re the perfect treat for breakfast, brunch, or a sweet afternoon snack.
Why You Will Love This Recipe:
These Pumpkin Cream Cheese Muffins capture the essence of autumn in every bite. You’ll adore them because:
- They Perfectly Recreate a Starbucks Favorite: Skip the coffee shop line and enjoy the same satisfying flavors in the comfort of your own home.
- The Balance of Flavors is Divine: The warm spices in the pumpkin muffin complement the tangy sweetness of the cream cheese filling, creating a harmonious and irresistible taste experience.
- The Texture is Addictive: The moist and tender muffin crumb contrasts beautifully with the creamy filling and the satisfying crunch of the pumpkin seeds on top.
- They’re Easier Than You Think: This recipe is straightforward and doesn’t require any fancy equipment or techniques. Even novice bakers can achieve bakery-worthy results.
- They’re Perfect for Sharing (or Not!): These muffins are ideal for gifting, potlucks, or simply enjoying as a personal indulgence.
Introduction
As the leaves turn golden and the air grows crisp, there’s nothing quite like the aroma of pumpkin spice wafting through the kitchen. These Starbucks Pumpkin Cream Cheese Muffins bring the comforting flavors of fall right to your fingertips. This recipe captures the essence of the famous coffee shop treat, allowing you to bake a batch of moist, spiced muffins with a creamy, tangy filling, all topped with the delightful crunch of pumpkin seeds. The combination of warm spices, sweet pumpkin, and rich cream cheese is a match made in autumnal heaven. Forget the long lines at the coffee shop; with this recipe, you can enjoy fresh, homemade muffins that are even better than the original. This recipe walks you through each step, providing clear instructions and helpful tips to ensure your muffins turn out perfectly every time. So, preheat your oven, gather your ingredients, and get ready to immerse yourself in the warm and comforting world of pumpkin spice baking! You’ll be amazed at how easy it is to create these bakery-quality muffins that will impress your family and friends.
Ingredients:
Muffins:
- 1 3/4 cups all-purpose flour
- 1 cup granulated sugar
- 1/2 cup packed brown sugar
- 1 tsp baking soda
- 1/2 tsp salt
- 2 tsp ground cinnamon
- 1/2 tsp ground nutmeg
- 1/2 tsp ground ginger
- 1/4 tsp ground cloves
- 2 large eggs
- 1 can (15 oz) pumpkin puree (not pumpkin pie filling)
- 1/2 cup vegetable oil
- 1/4 cup milk
- 1 tsp vanilla extract
Cream Cheese Filling:
- 8 oz cream cheese, softened
- 1/4 cup granulated sugar
- 1 large egg yolk
- 2 tsp vanilla extract
Topping:
- 1/2 cup pumpkin seeds (pepitas), raw or toasted
Preparation:
Step 1: Preheat and Prep
Preheat your oven to 375°F (190°C). This temperature is crucial for achieving a golden-brown crust and ensuring the muffins bake evenly. Line a 12-cup muffin tin with paper liners. Using paper liners makes it much easier to remove the muffins once they’re cooled and prevents them from sticking to the tin. If you don’t have liners, grease the muffin tin thoroughly with cooking spray or butter. Ensuring the muffin tin is prepared beforehand will streamline the baking process.
Step 2: Cream Cheese Filling
In a medium bowl, prepare the cream cheese filling. This component adds a rich, tangy contrast to the spiced pumpkin flavor. Combine the softened cream cheese, 1/4 cup granulated sugar, the egg yolk, and 2 teaspoons of vanilla extract. Beat with an electric mixer (or whisk vigorously by hand) until the mixture is smooth, creamy, and free of lumps. Make sure the cream cheese is properly softened to prevent lumps. The egg yolk contributes to the filling’s richness and helps it set during baking. Once the filling is ready, set it aside while you prepare the muffin batter.
Step 3: Dry Ingredients
In a large bowl, whisk together all the dry ingredients for the muffins. This step ensures that the leavening agent (baking soda) and spices are evenly distributed throughout the batter, resulting in a consistent texture and flavor. Combine the flour, granulated sugar, brown sugar, baking soda, salt, cinnamon, nutmeg, ginger, and cloves. Whisk vigorously until all ingredients are thoroughly combined. Pay special attention to breaking up any clumps of brown sugar. The brown sugar adds moisture and a subtle caramel flavor to the muffins.
Step 4: Wet Ingredients
In a separate bowl, whisk together the wet ingredients. This step creates an emulsion of the liquids, which will help to incorporate them evenly into the dry ingredients. Combine the eggs, pumpkin puree (make sure it’s pumpkin puree, not pumpkin pie filling), vegetable oil, milk, and vanilla extract. Whisk until the mixture is smooth and well combined. Using room-temperature eggs will help the wet ingredients blend more easily.
Step 5: Combine Wet and Dry
Pour the wet ingredients into the bowl with the dry ingredients. Using a rubber spatula or wooden spoon, gently mix until just combined. Be careful not to overmix the batter. Overmixing develops the gluten in the flour, which can result in tough muffins. It’s okay if there are a few small lumps; the batter will smooth out as it bakes. A light hand is key to achieving tender muffins.
Step 6: Assemble Muffins
Spoon a small amount of muffin batter into each muffin cup, filling it about 1/3 full. This creates a base for the cream cheese filling. Then, add a spoonful of the prepared cream cheese filling to the center of each cup. Finally, top with more muffin batter, filling each cup almost to the top. Be careful not to overfill the cups, as the muffins will rise during baking. Leaving a little space at the top will prevent them from overflowing.
Step 7: Topping
Sprinkle the pumpkin seeds (pepitas) evenly over the top of each muffin. This adds a delightful crunch and visual appeal. You can use raw or toasted pumpkin seeds, depending on your preference. Toasted pumpkin seeds have a slightly more intense flavor. Gently press the pumpkin seeds into the batter to help them adhere during baking.
Step 8: Bake
Place the muffin tin in the preheated oven and bake for 18-22 minutes, or until a toothpick inserted into the muffin (not the cream cheese filling) comes out clean. The baking time may vary depending on your oven, so it’s essential to check for doneness. If the tops of the muffins are browning too quickly, you can loosely tent the muffin tin with aluminum foil. The cream cheese filling will remain slightly soft, even when the muffins are done.
Step 9: Cool
Allow the muffins to cool in the pan for 5-10 minutes before transferring them to a wire rack to cool completely. This allows the muffins to firm up slightly, making them easier to remove from the tin. Cooling them on a wire rack prevents the bottoms from becoming soggy. Resist the temptation to eat them straight from the oven; they will taste even better once they’ve cooled down.
COOKING Rating: Easy
Serving Suggestions:
- Enjoy warm with a cup of coffee or tea.
- Serve as part of a brunch spread.
- Package individually for a thoughtful homemade gift.
- Pair with a scoop of vanilla ice cream for a decadent dessert.
- Enjoy as a satisfying snack any time of day.
Tips:
- Use Room Temperature Ingredients: For best results, use room temperature eggs and softened cream cheese. This will help the ingredients blend more evenly.
- Don’t Overmix: Overmixing the batter will result in tough muffins. Mix until just combined.
- Adjust Spices to Taste: Feel free to adjust the amount of spices to your liking. If you prefer a more intense spice flavor, add a little more cinnamon, nutmeg, or ginger.
- Store Properly: Store leftover muffins in an airtight container at room temperature for up to 3 days, or in the refrigerator for up to a week.
- Freeze for Later: Muffins can be frozen for up to 2 months. Wrap them individually in plastic wrap and then place them in a freezer bag. Thaw at room temperature before serving.
Prep Time: 20 minutes
Cook Time: 20 minutes
Total Time: 40 minutes
Nutritional Information: (per muffin, approximate)
Calories: 350
Protein: 5g
Sodium: 250mg
Conclusion
These Starbucks Pumpkin Cream Cheese Muffins are a delicious and satisfying treat that’s perfect for any occasion. The combination of warm spices, sweet pumpkin, and tangy cream cheese is simply irresistible. With this easy-to-follow recipe, you can recreate this coffee shop favorite in your own kitchen and impress your family and friends with your baking skills. So, grab your apron, gather your ingredients, and get ready to enjoy the taste of fall in every bite. Happy baking!
Q&A:
Q1: Can I use pumpkin pie filling instead of pumpkin puree?
A: No, it’s essential to use pumpkin puree, not pumpkin pie filling. Pumpkin pie filling contains added spices and sugar, which will alter the flavor and texture of the muffins. Pumpkin puree is simply cooked and pureed pumpkin without any additional ingredients, allowing you to control the spice levels and sweetness of the recipe. Using pumpkin pie filling will likely result in overly sweet and dense muffins.
Q2: What if I don’t have pumpkin seeds? Can I substitute them with something else?
A: Absolutely! If you don’t have pumpkin seeds on hand, you can substitute them with other nuts or seeds. Chopped pecans, walnuts, or even sunflower seeds would work well. You could also use a sprinkle of coarse sugar for added sweetness and crunch. The pumpkin seeds add a nice textural element, so choose a substitute that offers a similar crunch. If you don’t want crunch, you can completely omit the topping.
Q3: My cream cheese filling is too runny. What did I do wrong?
A: The most common cause of a runny cream cheese filling is not using softened cream cheese. Make sure your cream cheese is at room temperature before you begin. This allows it to blend smoothly with the other ingredients. If the filling is still too runny after mixing, you can try adding a tablespoon of cornstarch to help thicken it. Be sure to mix it in thoroughly to avoid any lumps. Also, ensure you only use the egg yolk, not the entire egg.
Q4: How can I prevent the muffins from sticking to the paper liners?
A: While paper liners are generally effective at preventing muffins from sticking, there are a few things you can do to ensure a clean release. First, make sure you allow the muffins to cool in the pan for at least 5-10 minutes before transferring them to a wire rack. This allows them to firm up slightly. If you’re still having trouble, you can try spraying the inside of the paper liners with cooking spray before filling them with batter.
Q5: Can I make these muffins ahead of time? How should I store them?
A: Yes, you can definitely make these muffins ahead of time! They are delicious enjoyed fresh or stored for later. To store them, place the cooled muffins in an airtight container at room temperature for up to 3 days. For longer storage, you can refrigerate them for up to a week. You can also freeze them for up to 2 months. To freeze, wrap each muffin individually in plastic wrap and then place them in a freezer bag. Thaw at room temperature before serving. They’re the perfect make-ahead treat for busy mornings or unexpected guests!